本章知识点
1、Centos下python3环境的部署 2、Python uwsgi 3、Python uwsgi+nginx部署 4、mysql主从备份介绍 5、Linux下的mysql安装 6、基于mysql的Django读写分离
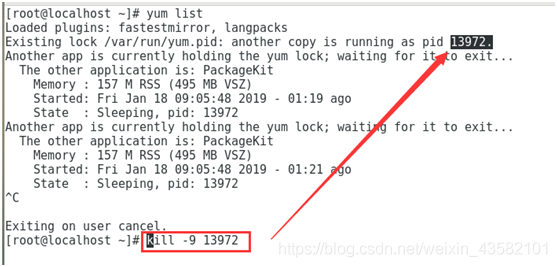
知识点讲解 1、Centos下python3环境的部署 Yum源,就是我们的安装源。 检测yum是否完好 Yum list 当遇到以下问题 Yum 进程没有关闭 错误:1 Yum 源没有配置
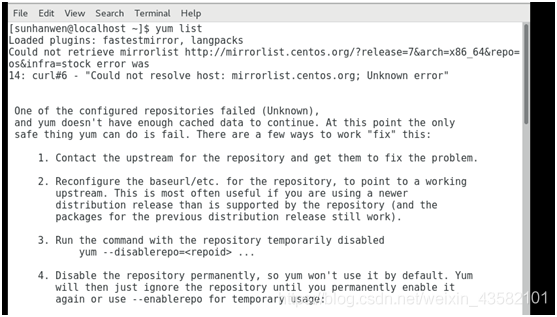
配置yum源: https://www.linuxidc.com/Linux/2017-08/146364.htm 错误:2 Pid 进程id
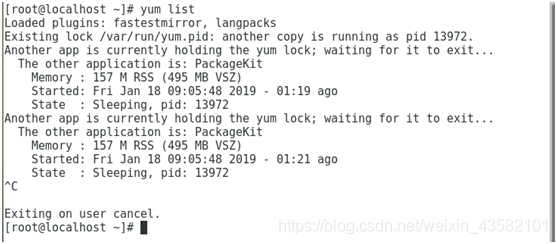
Kill -9 pid 杀死进程
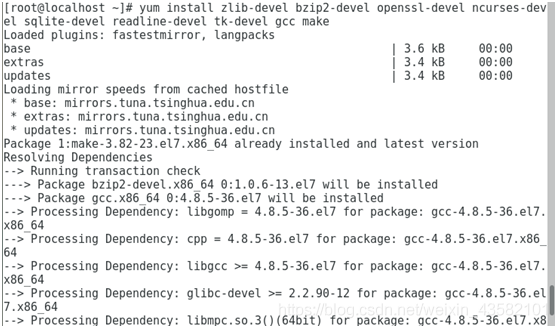
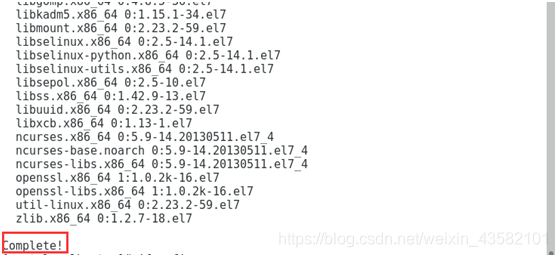
安装python需要的依赖包 Yum -y install zlib-devel bzip2-devel openssl-devel ncurses-devel sqlite-devel readline-devel tk-devel gcc make
Unix系统默认安装了python Centos 6 安装 python2.6版本 Centos 7 安装 python2.7版本

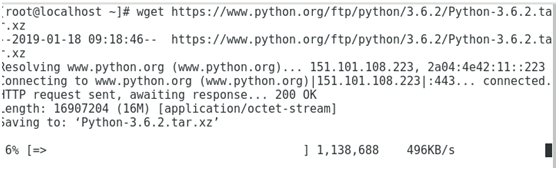
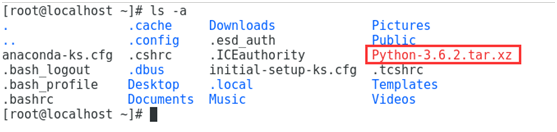
我们需要的版本是python 3.6.2,在centos上进行python2和3并存 下载python 3.6.2的包 wget https://www.python.org/ftp/python/3.6.2/Python-3.6.2.tar.xz
补充: 协议:网络上数据传输的约定规则 Tcp 面向连接的协议,有校验的数据包 Udp 无连接 可容忍丢包率 http 常规的http https 加密的http ftp 文件传输 Ssh 远程空开 Sftp 基于ssh的文件传输 Smtp 协议

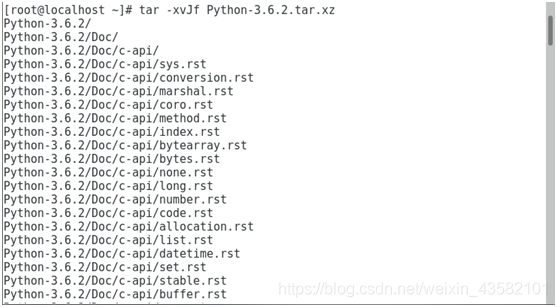
解压安装包
tar -xvJf Python-3.6.2.tar.xz
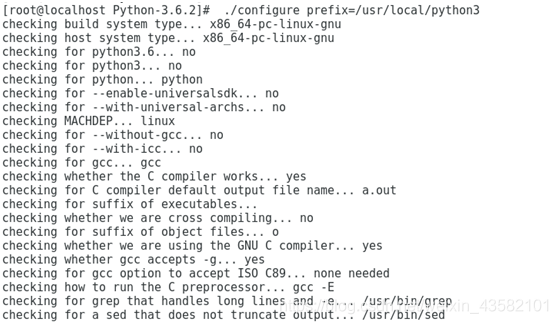
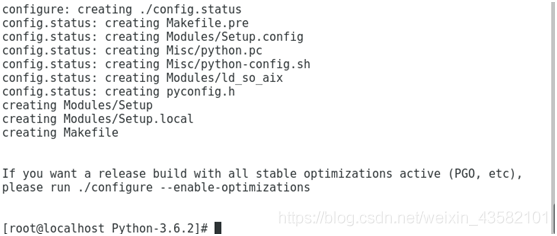
编译安装

./configure prefix=/usr/local/python3
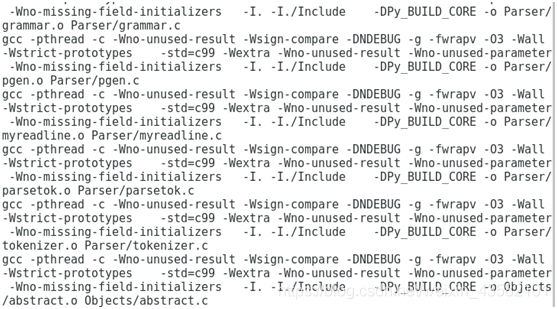
Make && make install
配置软连接(环境变量)
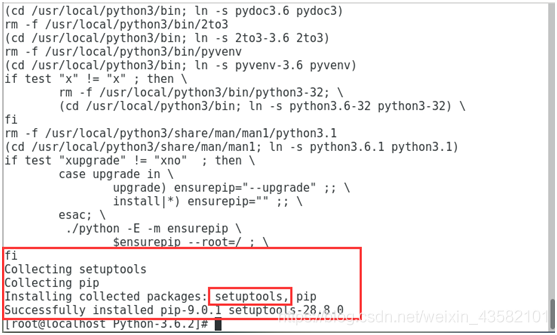
软连接 --> 快捷方式 ln -s /usr/local/python3/bin/python3 /usr/bin/python3 ln -s /usr/local/python3/bin/pip3 /usr/bin/pip3

测试:

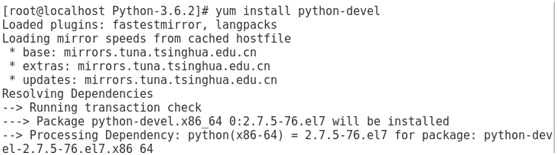
以后我们运行python3的脚本需要编程 python3 *.py 安装python的扩展包 yum install python-devel
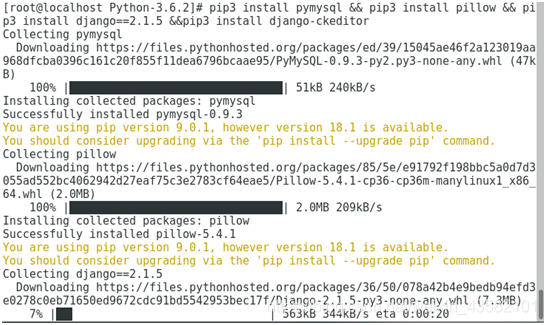
安装python 开发包 Pymysql Pillow Django2.1.5 django-ckeditor pip3 install pymysql && pip3 install pillow && pip3 install django2.1.5 &&pip3 install django-ckeditor
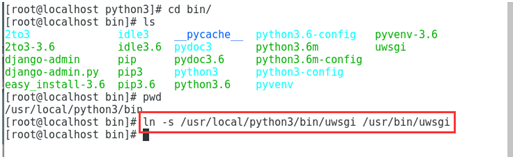
2、Python uwsgi Python 的web项目,本身很难和Apache或者Nginx进行结合,为了让python web项目更加方便的被部署,开发出了uwsgi。 安装: Pip安装uwsgi

创建软连接 ln -s /usr/local/python3/bin/uwsgi /usr/bin/uwsgi
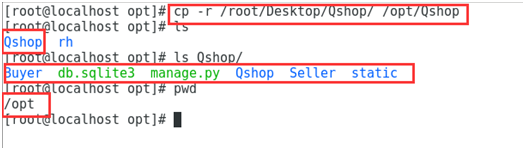
使用: 我们迁移我们的项目Qshop 复制我们的项目到虚拟机
cp -r /root/Desktop/Qshop/ /opt/Qshop
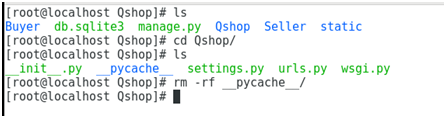
我们需要清除pycharm的配置文件,初始的导入文件
测试项目 python3 manage.py runserver 0.0.0.0:8000
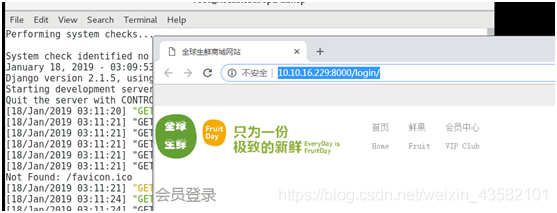
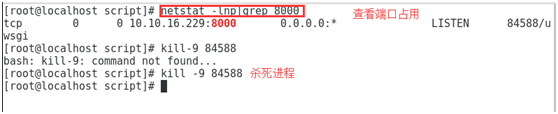
注意: Systemctl stop firewalld 关闭防火墙

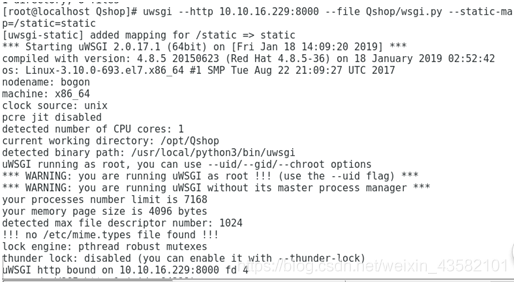
用uwsgi启动django uwsgi --http 10.10.16.229:8000 --file Qshop/wsgi.py --static-map=/static=static uwsgi 模块名称 –http 协议 10.10.16.229:8000 主机端口 –file uwsgi要使用的解析文件,一般django自己创建 –static 静态目录
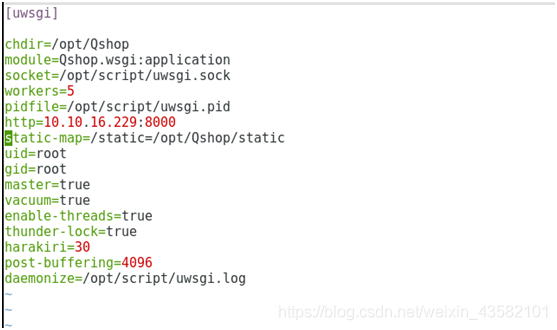
上面我们采用的是命令的方式使用uwsgi启动django,但是,不够完美。我们可以构造配置文件进行操作。 配置内容如下 [uwsgi]
chdir=/opt/OurBlog #项目目录
module=OurBlog.wsgi:application #指定项目的application
socket=/opt/script/uwsgi.sock #指定sock的文件路径
workers=5 #进程个数
pidfile=/opt/script/uwsgi.pid
http= 192.168.2.69:8000 #指定IP端口
static-map=/static=/opt/OurBlog/static #指定静态文件
uid=root #用户
gid=root #组
master=true #启用主进程
vacuum=true #自动移除unix Socket和pid文件当服务停止的时候
enable-threads=true #启用线程
thunder-lock=true #序列化接受的内容,如果可能的话
harakiri=30 #设置自中断时间
post-buffering=4096 #设置缓冲
daemonize=/opt/script/uwsgi.log #设置日志目录
1、创建uwsgi文件的配置文件目录和文件
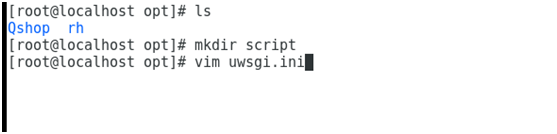
2、编写内容
启动uwsgi

授权

杀死进程重启
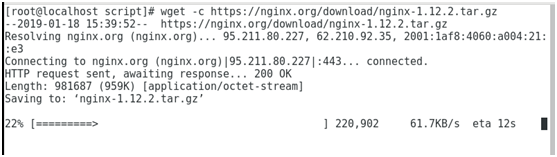
2、Python uwsgi+nginx部署 wget -c https://nginx.org/download/nginx-1.12.2.tar.gz
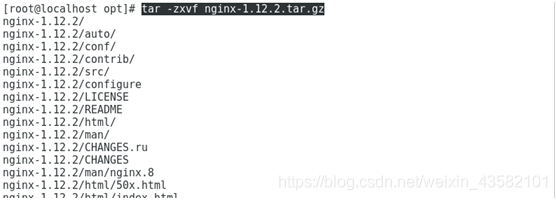
解压 tar -zxvf nginx-1.12.2.tar.gz
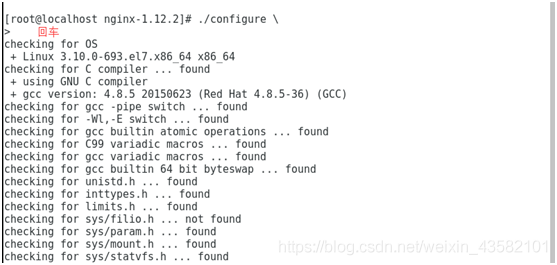
编译安装 ./configure make && make install

Nginx /usr/local/nginx

创建软连接

Nginx通讯uwsgi

修改Nginx的配置文件
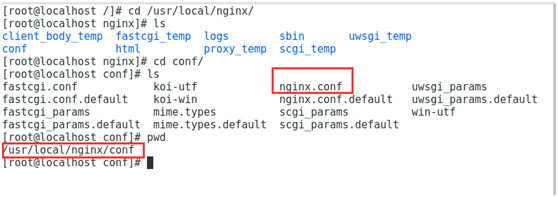
备份配置文件

开始配置
http {
include mime.types;
default_type application/octet-stream;
log_format main '$remote_addr - $remote_user [$time_local] "$request" '
'$status $body_bytes_sent "$http_referer" '
'"$http_user_agent" "$http_x_forwarded_for"'; 日志的格式
#access_log logs/access.log main;
sendfile on;
#tcp_nopush on;
#keepalive_timeout 0;
keepalive_timeout 65;
#gzip on;
server {
listen 80;
server_name Qshop; 服务的名称
charset utf-8; 编码格式
access_log logs/host.access.log main; 访问日志
gzip_types text/plain application/x-javascript text/css text/javascript application/x-httpd-php application/json text/json image/jpeg image/gif image/png application/octet-stream; 访问内容的类型
error_log /var/log/nginx/error.log error; 错误日志,默认没有,需要手动创建
location / {
include uwsgi_params; 加载uwsgi_params
uwsgi_connect_timeout 30; 连接的超时时间 不要加冒号不要加冒号不要加冒号
uwsgi_pass unix:/opt/script/uwsgi.sock; uwsgi.sock通讯的文件地址
}
location = /static/{
alias /opt/Qshop/static; 静态文件的目录
index index.html index.htm;
}</code></pre></div></div><p>杀死当前状态下的所有Nginx服务
Pkill -9 nginx
从新启动
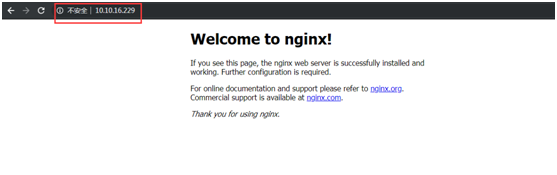
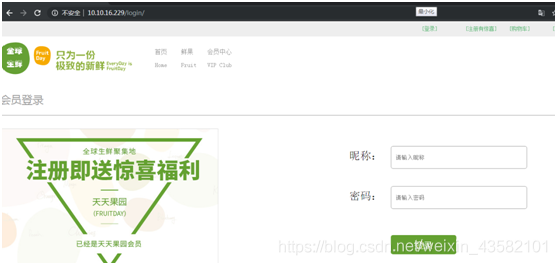
访问网站:
 在这里插入图片描述
商城数据库读写分离:
知识点:
1、mysql主从备份介绍
2、Linux下的mysql安装
3、基于mysql的Django读写分离
知识点讲解
1、mysql主从备份介绍
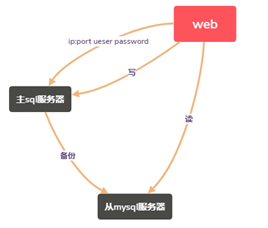
备份:安全。
目的:Django网站数据库读写分离设置。在我们工作当中,发现有的数据表经常查询,有的表 经常写入。同时交给一个数据库,效率不高。
 在这里插入图片描述
2、Linux下的mysql安装
2台Centos7 虚拟机
Server 主Ip 10.10.16.229
Client 从Ip 10.10.16.141
关闭防火墙
 在这里插入图片描述
测试ping
 在这里插入图片描述
3、基于mysql的Django读写分离
在Linux安装mariadb数据库
Mysql本身是开源的,大家用的很开心,但是有一家数据库大户,oracle公司看上了mysql,觉得收购,并且答应mysql我们依然开源。果然,后来收费了。Mysql的团队,不忿,然后从新写了mysql的妹妹:mariadb,mariadb和mysql相识度到99%。并且免费。所以,centos7系统,我们使用mariadb。
Centos7 官方yum源包含mariadb的完整安装,所以我们需要的只是一条安装命令。
yum -y install mariadb mariadb-server 安装mariadb
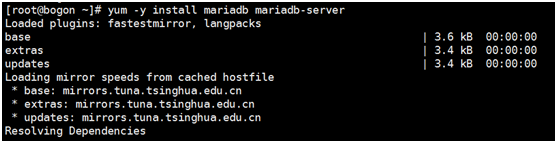 在这里插入图片描述
 在这里插入图片描述
Systemctl start mariadb 启动mariadb
 在这里插入图片描述
给root添加密码
 在这里插入图片描述
安装telnet,这个工具在mysql主从备份会用到
yum install telnet.x86_64 telnet-server.x86_64
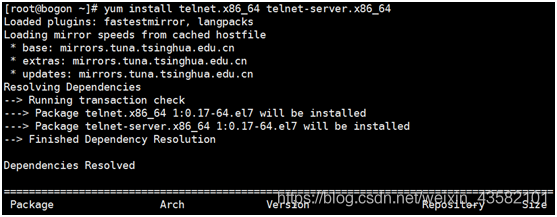 在这里插入图片描述
 在这里插入图片描述
为了后面的实验,我们在主mysql创建一个小小的数据库
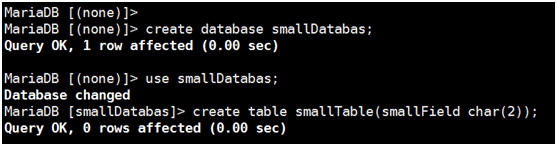 在这里插入图片描述
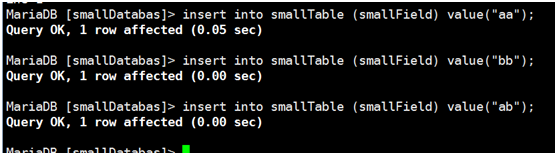 在这里插入图片描述
主从配置
查看主数据库
 在这里插入图片描述
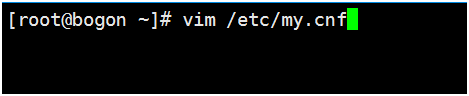
修改数据库配置
/etc/my.cnf
备份配置文件
 在这里插入图片描述
访问配置文件
 在这里插入图片描述
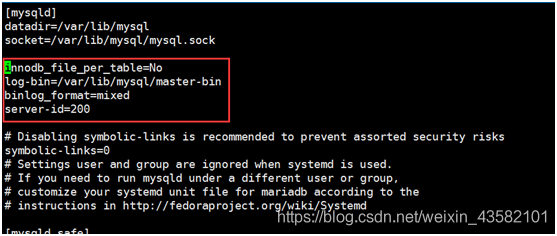
配置主服务器的配置文件
/etc/my.cnf
 在这里插入图片描述
重启mariadb
systemctl restart mariadb
 在这里插入图片描述
进入数据库进行授权
GRANT REPLICATION SLAVE ON . TO “root”@“10.10.16.%” IDENTIFIED BY’admin’
GRANT 授权
REPLICATION 权限
SLAVE 备份
ON 在。。之上
. 所有权限
TO 给,去
“root” 用户
“10.10.16.%”16网段所有ip
IDENTIFIED BY 确认密码
Admin 备份的密码
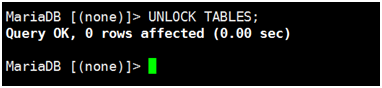
在工作当中,我们备份的时候,可以允许读操作,不允许写操作,我们需要在备份的时候对数据库进行加锁。
加锁
FLUSH TABLES WITH READ LOCK;
然后备份数据库
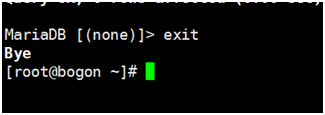
导入和导出都是基于数据库外的,操作之前请退出数据库
 在这里插入图片描述
数据库数据导出
mysqldump -uroot -p123 --all-databases > /root/db.sql
 在这里插入图片描述
解锁
 在这里插入图片描述
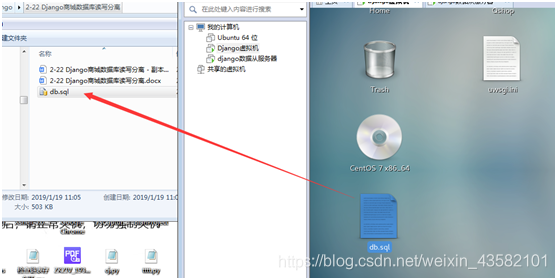
数据库数据导入
 在这里插入图片描述
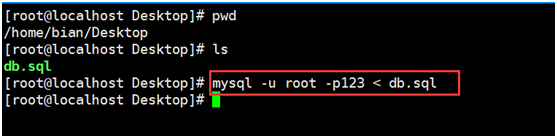 在这里插入图片描述
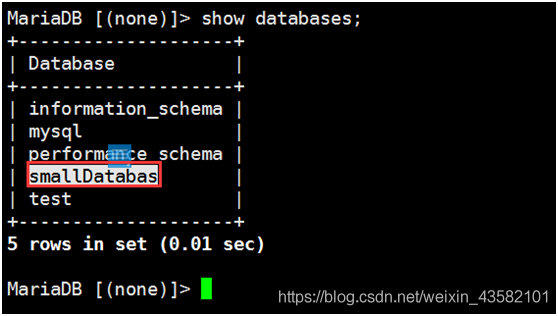 在这里插入图片描述
本章总结
mysql主从备份介绍
Linux下的mysql安装
基于mysql的Django读写分离