Exceptionless 是一个开源的实时的日志收集框架,它将日志收集变得简单易用并且不需要了解太多的相关技术细节及配置。本篇基于我的上一篇《基于Exceptionless实现分布式日志》,最近在公司内部搭建日志平台,且部署到了基于阿里云的生产环境,因此做个记录,也希望能帮助到希望基于Exceptionless来做日志平台的朋友们。
一、本地部署前置条件
这里主要参考Exceptionless的Self-Hosting Wiki文档,下面是官方推荐的生产环境的前提条件:
- .NET 4.7
- IIS 7.5+
- PowerShell 3+
- Java JDK 1.8+
- ElasticSearch 5.6.
相信你会有两个疑问:
(1)为何要用.NET 4.7和IIS?
因为Exceptionless的Web Dashboard是基于ASP.NET(基于.NET Framework)实现的,因此需要.NET 4.7(当然4.6.1也是支持的)和IIS(.NET Framework还没有实现跨平台),因此最好是部署在Windows Server上面。因为我要部署的阿里云服务器刚好是一台Windows Server 2016,因此也很方便地安装了.NET 4.7和IIS 10。而PowerShell则是用来跑一个启动相关服务(ElasticSearch + Kibna)的Windows下的PowerShell脚本的,因此可以做到开机启动。
(2)ElasticSearch部署在哪里?
官方推荐ElasticSearch至少三个节点,且至少两个节点部署在Linux系统上。对于数据量不大的内部业务微服务系统,可以直接在Windows Server中部署ElasticSearch,当然官方声明ElasticSearch在Linux中的性能表现更好。而ElasticSearch是基于Java编写的,因此也就需要安装JDK(JRE)来作为运行时,当然你要先安装一下JDK,并将其配置到环境变量中。
因此,基于业务量不大(目前只有一个内部业务系统和一个官方网站在用Exceptionless),我暂且将Web Dashboard和ElasticSearch都部署在Windows Server服务器中。
二、开始本地部署
2.1 下载Exceptionless本地部署包
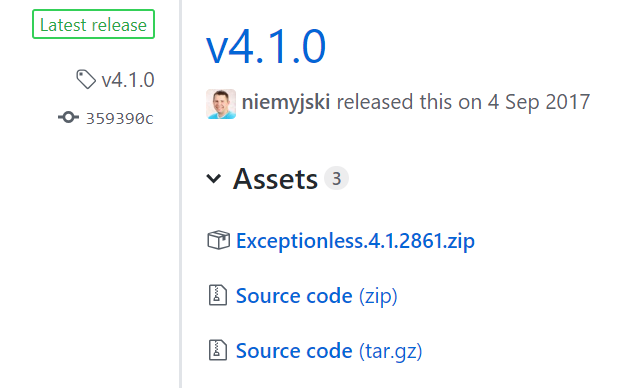
Exceptionless虽然是一款开源日志平台框架,但是其也有收费版,且收费版支持多语言(包括中文),但是其开源本地部署版还是2017年9月的Release版本。我们要做的第一件事就是去下载Release包:v4.1.0

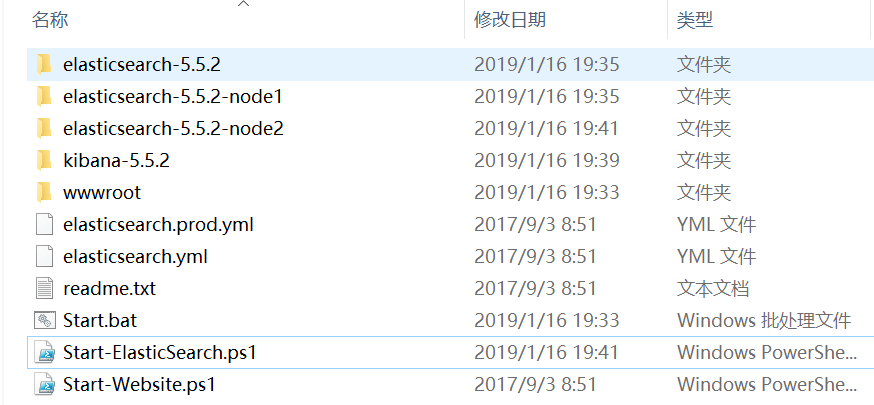
解压这个zip包后的文件如下:

其中,Start.bat是一个快速安装和启动的批处理文件,它会帮我们调用两个PowerShell脚本(Start-ElasticSearch及Start-WebSite),可以帮助我们安装ElasticSearch + Kibna以及帮我们启动一个IIS Express并部署好Web Dashboard项目。
2.2 安装ElasticSearch
这里我将Start.bat修改为以下一句话,意为只安装ElasticSearch,不让其帮我启动IIS Express来部署Web Dashboard项目。
>>PowerShell .\Start-Elasticsearch.ps1
然后编辑Start-ElasticSearch.ps1这个PowerShell脚本,将其Param部分修改为如下:
Param(
  [string]$Version = "5.5.2",
  [int]$NodeCount = 2,
  [bool]$StartKibana = $false,
  [int]$StartPort = 9200,
  [bool]$OpenKibana = $true,
  [bool]$ResetData = $false
)
这里我选择不启动Kibana,以及将默认的ElasticSearch节点数从一个节点改为了两个节点。
为了能够正常执行PowerShell脚本,先以管理员权限执行一下下面这行命令:
>>Powershell Set-ExecutionPolicy Unrestricted
点击Start.bat,开始调用Start-ElasticSearch进行ElasticSearch的安装和启动,等待一会儿,下载后的文件夹如下图所示:

这时ElasticSearch已经在运行,并监听了9200端口,请不要关闭命令行窗口,因为这时ElasticSearch不是在后台运行的。
2.3 部署Web控制台项目
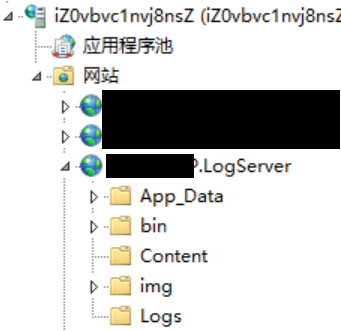
由于我的环境是Windows Server 2016,因此启动IIS,按照老习惯创建一个.NET应用程序池(v4.0)来附加wwwroot文件夹作为Web控制台,端口号默认设为50000。

现在开始进行配置文件的设置:
(1)app.config.xxxx.js
这里主要修改BASE_URL为你的服务器访问IP地址:
(function () {
  'use strict';
angular.module('app.config', [])

.constant('BASE_URL', 'http://192.168.16.150')

.constant('EXCEPTIONLESS_API_KEY')

.constant('FACEBOOK_APPID')

.constant('GITHUB_APPID')

.constant('GOOGLE_APPID')

.constant('INTERCOM_APPID')

.constant('LIVE_APPID')

.constant('SLACK_APPID')

.constant('STRIPE_PUBLISHABLE_KEY')

.constant('SYSTEM_NOTIFICATION_MESSAGE')

.constant('USE_HTML5_MODE', false)

.constant('USE_SSL', false);

}());
(2)Web.config
在Web.config中,需要配置如下的一些内容:
<connectionStrings>

<!-- 如果开启了Redis缓冲 -->

<add name="RedisConnectionString" connectionString="192.168.16.151:6379,abortConnect=false" />

<!-- ElasticSearch的访问地址 -->

<add name="ElasticSearchConnectionString" connectionString="http://192.168.16.150" />

<add name="LdapConnectionString" connectionString="" />

</connectionStrings>
当然,如果你已经在Linux中安装了ES,那么直接修改Web.config的ElasticSearch的连接字符串即可。
其次,是appSettings中的一些基本信息:
  <appSettings>

<!-- Base url for the ui used to build links in emails and other places. -->

<add key="BaseURL" value="http://192.168.16.150/#" />

<!-- Controls whether SSL is required. Only enable this if you have SSL configured. -->

<add key="EnableSSL" value="false" />

<!--

Dev: Use this mode when debugging. (Outbound emails will not be sent)

QA: Use this mode when deployed to staging. (Outbound emails restricted)

Production: Use this mode when deployed to production.

-->

<add key="WebsiteMode" value="Production" />

<!-- Controls whether users can signup. -->

<add key="EnableAccountCreation" value="true" />

<!-- Controls whether daily summary emails are sent -->

<add key="EnableDailySummary" value="true" />

......

</appSettings>
这里主要是修改BaseURL(你要公布的Web端的访问地址)和WebsiteMode(这里选择Production,此模式下默认允许出站邮件发送)。
最后,是关于邮件的基本配置,以便能够正常的发送邮件:
    <add key="SmtpHost" value="smtp.exmail.qq.com" />

<add key="SmtpPort" value="465" />

<add key="SmtpEncryption" value="SSL" />

<add key="SmtpFrom" value="edisonchou@companyname.com" />

<add key="SmtpUser" value="edisonchou@companyname.com" />

<add key="SmtpPassword" value="your-password" />*.这里记得一定要加上SmtpFrom,而且SmtpFrom需与SmtpUser保持一致。
其他几个需要了解的设置,这里我使用默认配置,不更改其Value:
    <!-- 异常数据-默认存储在文件夹storage中 -->

<add key="StorageFolder" value="|DataDirectory|\storage" />

<!-- 在当前Web网站进程中运行Jobs -->

<add key="RunJobsInProcess" value="true" />

<add key="aspnet:UseTaskFriendlySynchronizationContext" value="true" />

<!-- 保留日志天数 -->

<add key="MaximumRetentionDays" value="90" />

<!-- 分片数量 -->

<add key="ElasticSearchNumberOfShards" value="3" />

<!-- 复制分片数量 -->

<add key="ElasticSearchNumberOfReplicas" value="1" />
三、将ElasticSearch设置为开机启动项
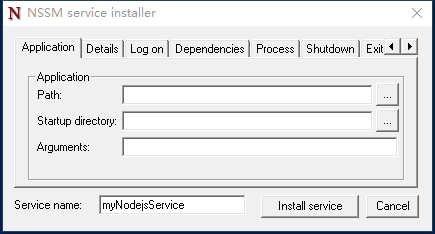
由于Exceptionless依赖于ElasticSearch,因此需要将ES设为开机启动或Windows服务。可以使用NSSM或直接将Start.bat加入计划任务,不再赘述。

四、配置ASP.NET Core客户端
安装Exceptionless的ASP.NET Core客户端:
NuGet>>Install-Package Exceptionless.AspNetCore
*.目前最新版本为1.0.2
在StartUp启动类中,分别注入封装的Logger和使用Exceptionless中间件
    public static class ExceptionlessBuilderExtensions
    {
        public static IApplicationBuilder UseExceptionless(this IApplicationBuilder app, IConfiguration configuration)
        {
            var isEnableLogger = Convert.ToBoolean(configuration["Exceptionless:Enabled"] ?? "false");
            if (isEnableLogger)
            {
                // 封装使用Exceptionless分布式日志组件
                ExceptionlessClient.Default.Configuration.ApiKey = configuration["Exceptionless:ApiKey"];
                ExceptionlessClient.Default.Configuration.ServerUrl = configuration["Exceptionless:ServerUrl"];
                ExceptionlessClient.Default.SubmittingEvent += OnSubmittingEvent;
                app.UseExceptionless();
            }
        return app;
    }

    private static void OnSubmittingEvent(object sender, EventSubmittingEventArgs e)
    {
        // 只处理未处理的异常
        //if (!e.IsUnhandledError)
        //{
        //    return;
        //}

        // 忽略404错误
        if (e.Event.IsNotFound())
        {
            e.Cancel = true;
            return;
        }

        // 忽略没有错误体的错误
        var error = e.Event.GetError();
        if (error == null)
        {
            return;
        }

        // 忽略 401 (Unauthorized) 和 请求验证的错误.
        if (error.Code == "401" || error.Type == "System.Web.HttpRequestValidationException")
        {
            e.Cancel = true;
            return;
        }

        // Ignore any exceptions that were not thrown by our code.
        //var handledNamespaces = new List<string> { "Exceptionless" };
        //if (!error.StackTrace.Select(s => s.DeclaringNamespace).Distinct().Any(ns => handledNamespaces.Any(ns.Contains)))
        //{
        //    e.Cancel = true;
        //    return;
        //}

        // 添加附加信息.
        //e.Event.Tags.Add("EDC.Core");
        //e.Event.MarkAsCritical();
    }
}</code></pre></div></div><p>  其他配置和用法,请参考我的这一篇《基于Exceptionless实现分布式日志》来使用。</p><p>  下面是配置好后的Web控制台:</p><figure class=""><div class="rno-markdown-img-url" style="text-align:center"><div class="rno-markdown-img-url-inner" style="width:100%"><div style="width:100%"><img src="https://cdn.static.attains.cn/app/developer-bbs/upload/1723240808994702308.png" /></div></div></div></figure><p>  如果需要获得邮件通知及发送邮件到注册用户进行验证:</p><figure class=""><div class="rno-markdown-img-url" style="text-align:center"><div class="rno-markdown-img-url-inner" style="width:100%"><div style="width:100%"><img src="https://cdn.static.attains.cn/app/developer-bbs/upload/1723240809353225653.png" /></div></div></div></figure><p>  如果要获得每日的项目报告,请记得将Web.config中EnableDailySummary设为true。个人觉得邮件通知critical errors的功能很实用,再多的notification就是骚扰了。因此,我只勾选了一个critical errors。此外,要启用邮件通知,请先通过注册发送给你的email进行账户验证(如下图所示),否则无法启用邮件通知。</p><figure class=""><div class="rno-markdown-img-url" style="text-align:center"><div class="rno-markdown-img-url-inner" style="width:100%"><div style="width:100%"><img src="https://cdn.static.attains.cn/app/developer-bbs/upload/1723240809634042626.png" /></div></div></div></figure><p>  Then, enjoy your bug exceptions :</p><figure class=""><div class="rno-markdown-img-url" style="text-align:center"><div class="rno-markdown-img-url-inner" style="width:100%"><div style="width:100%"><img src="https://cdn.static.attains.cn/app/developer-bbs/upload/1723240809798995775.png" /></div></div></div></figure><h2 id="71ajm" name="%E4%BA%94%E3%80%81%E4%B8%80%E4%BA%9B%E5%85%B6%E4%BB%96%E6%B3%A8%E6%84%8F%E4%BA%8B%E9%A1%B9">五、一些其他注意事项</h2><p>  这里可以参考园友 花儿笑弯了腰 的这篇《Self Host 使用 Exceptionless 实时监控程序运行日志服务》,他讲述了一些QA,也许会有你也遇到的坑:</p><figure class=""><div class="rno-markdown-img-url" style="text-align:center"><div class="rno-markdown-img-url-inner" style="width:100%"><div style="width:100%"><img src="https://cdn.static.attains.cn/app/developer-bbs/upload/1723240810060135893.png" /></div></div></div></figure><h2 id="836aj" name="%E5%8F%82%E8%80%83%E8%B5%84%E6%96%99">参考资料</h2><p>Exceptionless GitHub</p><p>Exceptionless Self-Host Document</p><p>uptothesky,《Exceptionless本地部署》</p><p>uptothesky,《Exceptionless邮箱配置》</p><p>akaxb,《Exceptionless本地部署小结》</p><p>依乐祝,《Exceptionless安装配置及简单实用》</p><p>花儿笑弯了腰,《Self Host 使用 Exceptionless 实时监控程序运行日志服务》</p>