为何别人用得好好的人脸识别、目标检测开源模型,到了初学者手中,效果却惨不忍睹?其中原因可能很多,有时候这个原因很“愚蠢”。
最近一位Medium上的博主Adam Geitgey给初学者指出了一个极其简单而又容易忽视的关键点:相机的Exif信息。

在开发和使用计算机视觉(CV)模型的过程中,由于NumPy、TensorFlow和电脑上的图片查看器在处理Exif上存在着差异,让这个问题变得十分隐秘。
Adam是一位知名的机器学习课程博主,他的博客内容非常实用,几乎篇篇都能收获上千赞,足见其受欢迎的程度。

他在最新的文章中指出了CV模型在处理Exif存在的缺失,以及补救方法,下面是他文章的主要内容。
Exif信息害死人
普通智能手机或者相机拍照时,如果手持方向发生变化,内部的重力感应器件会告诉设备,照片究竟哪个边是向上的。
当我们在手机、相机或者电脑的Photoshop软件上查看照片时,完全没有问题,就像这样:
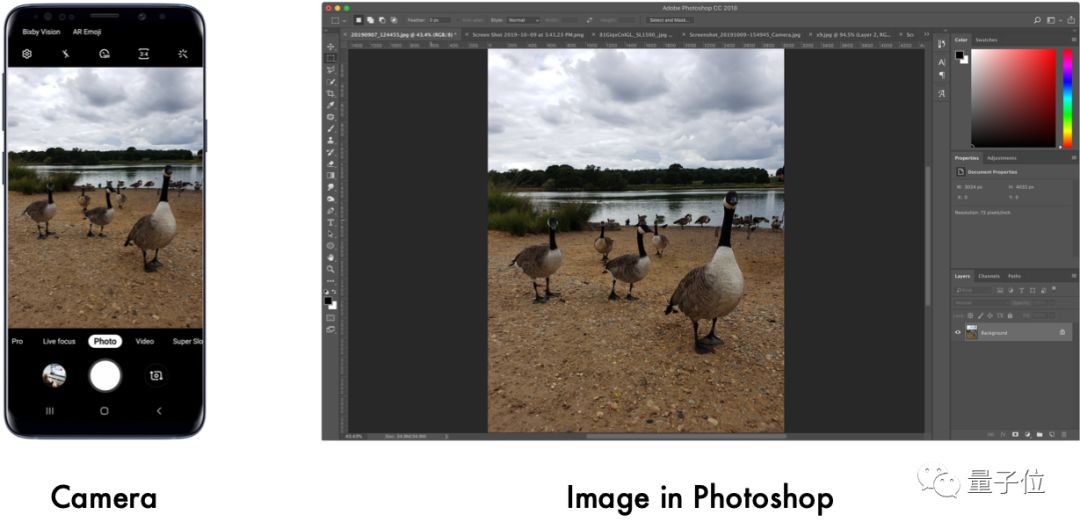
然而眼见并非为实,实际图像的像素数据不会旋转。这是由于图像传感器是对连续的像素信息流进行逐行读取,因此你无论纵向和横向握持相机,图像都是按照一个方向进行存储。

那么拍照设备和电脑为什么就能按照正确的方向显示图片呢?这是因为照片里还保存着一组元数据,称之为Exif,即可交换图像文件格式(Exchangeable image file format)。
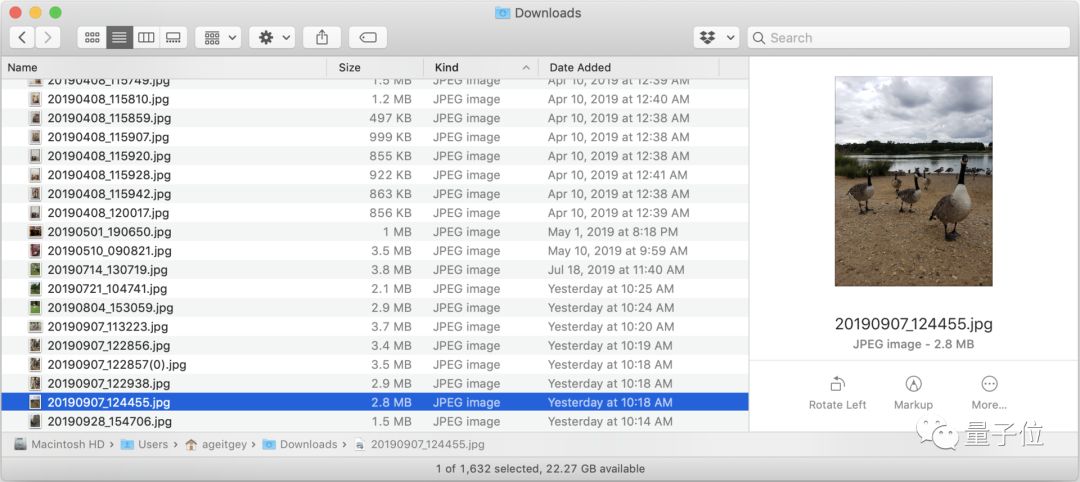
Exif中包含着照片的像素数、焦距、光圈等信息,其中还有一个方向(Orientation)的数据。

上图中Orientation一项的参数是Rotate 90 CW,意思是图像在显示前需要顺时针旋转90度。如果图片查看程序没有执行此操作,你就只能拧着脖子看了。

Exif原先是用在TIFF图像格式上,后来才加入到JPEG图像格式中,而图像数据集中的图片大多是JPEG格式。
一些程序为了保持向后兼容性,不会去解析Exif数据。大多数用于处理图像数据的Python库(如NumPy、SciPy,TensorFlow,Keras等)就是这样的。
这意味着当你使用这些工具导入图像时,都将获得原始的未旋转图像数据。如果把这些侧躺着或上下颠倒的图像输入到CV模型中,会得到错误的检测结果。
这个问题看起来很愚蠢,似乎初学者会犯这样的低级错误。但事实并非如此!甚至连Google云上的视觉API Demo也无法正确处理Exif方向问题:

如果我们把图像旋转到正确的方向再上传,检测的结果与上图相比将完全改变:

当我们在电脑上查看图片时完全没问题,但是一用到模型中就不正常。因此很难发现问题的所在。
这也导致一些开发者在Github上提问,抱怨他们正在使用的开源项目已损坏,或是模型不够准确。但是实际上问题要简单得多,只是图片的方向错了!
解决方法
解决以上问题的方法就是,在导入图像时检查它们的Exif数据,在必要时旋转图像。Adam已经写好了一段代码:
import PIL.Image import PIL.ImageOps import numpy as npdef exif_transpose(img):
if not img:
return imgexif_orientation_tag = 274 # Check for EXIF data (only present on some files) if hasattr(img, "_getexif") and isinstance(img._getexif(), dict) and exif_orientation_tag in img._getexif(): exif_data = img._getexif() orientation = exif_data[exif_orientation_tag] # Handle EXIF Orientation if orientation == 1: # Normal image - nothing to do! pass elif orientation == 2: # Mirrored left to right img = img.transpose(PIL.Image.FLIP_LEFT_RIGHT) elif orientation == 3: # Rotated 180 degrees img = img.rotate(180) elif orientation == 4: # Mirrored top to bottom img = img.rotate(180).transpose(PIL.Image.FLIP_LEFT_RIGHT) elif orientation == 5: # Mirrored along top-left diagonal img = img.rotate(-90, expand=True).transpose(PIL.Image.FLIP_LEFT_RIGHT) elif orientation == 6: # Rotated 90 degrees img = img.rotate(-90, expand=True) elif orientation == 7: # Mirrored along top-right diagonal img = img.rotate(90, expand=True).transpose(PIL.Image.FLIP_LEFT_RIGHT) elif orientation == 8: # Rotated 270 degrees img = img.rotate(90, expand=True) return imgdef load_image_file(file, mode='RGB'):
# Load the image with PIL
img = PIL.Image.open(file)if hasattr(PIL.ImageOps, 'exif_transpose'): # Very recent versions of PIL can do exit transpose internally img = PIL.ImageOps.exif_transpose(img) else: # Otherwise, do the exif transpose ourselves img = exif_transpose(img) img = img.convert(mode) return np.array(img)</code></pre></div></div><p>加入以上代码后,就可以正确地将图像导入Keras或TensorFlow了。</p><p>如果觉得麻烦,Adam还把上面的代码打包好了,在GitHub上这个项目叫做<strong>image_to_numpy</strong>。一行代码就可以完成安装:</p><div class="rno-markdown-code"><div class="rno-markdown-code-toolbar"><div class="rno-markdown-code-toolbar-info"><div class="rno-markdown-code-toolbar-item is-type"><span class="is-m-hidden">代码语言:</span>javascript</div></div><div class="rno-markdown-code-toolbar-opt"><div class="rno-markdown-code-toolbar-copy"><i class="icon-copy"></i><span class="is-m-hidden">复制</span></div></div></div><div class="developer-code-block"><pre class="prism-token token line-numbers language-javascript"><code class="language-javascript" style="margin-left:0">pip3 install image_to_numpy</code></pre></div></div><p>以后,你在自己的Python代码中加入这样几句即可。</p><div class="rno-markdown-code"><div class="rno-markdown-code-toolbar"><div class="rno-markdown-code-toolbar-info"><div class="rno-markdown-code-toolbar-item is-type"><span class="is-m-hidden">代码语言:</span>javascript</div></div><div class="rno-markdown-code-toolbar-opt"><div class="rno-markdown-code-toolbar-copy"><i class="icon-copy"></i><span class="is-m-hidden">复制</span></div></div></div><div class="developer-code-block"><pre class="prism-token token line-numbers language-javascript"><code class="language-javascript" style="margin-left:0">import matplotlib.pyplot as pltimport image_to_numpy
Load your image file
img = image_to_numpy.load_image_file("my_file.jpg")
Show it on the screen (or whatever you want to do)
plt.imshow(img)
plt.show()
传送门
快速导入旋转图像的image_to_numpy:
https://github.com/ageitgey/image_to_numpy
作者系网易新闻·网易号“各有态度”签约作者