一、安装httpbin文件准备
1.1 httpbin-deployment.yaml
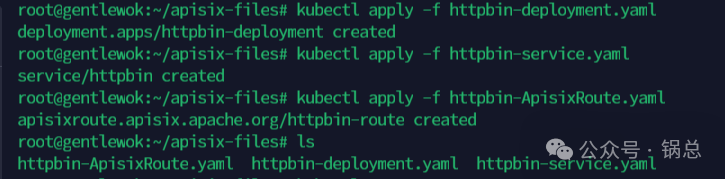
httpbin-deployment 应用
代码语言:txt
复制
apiVersion: apps/v1
kind: Deployment
metadata:
name: httpbin-deployment
spec:
replicas: 1
selector:
matchLabels:
app: httpbin-deployment
template:
metadata:
labels:
app: httpbin-deployment
spec:
containers:
-
name: httpbin-deployment
image: kennethreitz/httpbin:latest
imagePullPolicy: IfNotPresent
ports:
-
name: http
containerPort: 80
protocol: TCP
resources: {}
livenessProbe:
tcpSocket:
port: 80
initialDelaySeconds: 2
timeoutSeconds: 2
periodSeconds: 5
successThreshold: 1
failureThreshold: 3
readinessProbe:
tcpSocket:
port: 80
initialDelaySeconds: 2
timeoutSeconds: 2
periodSeconds: 5
successThreshold: 1
failureThreshold: 3</code></pre></div></div><p></p><h4 id="9fq42" name="1.2-httpbin-service.yaml">1.2 httpbin-service.yaml
httpbin-deployment应用的kubernetes service
代码语言:txt复制apiVersion: v1
kind: Service
metadata:
name: httpbin
spec:
selector:
app: httpbin-deployment
ports:
- name: http
port: 80
protocol: TCP
targetPort: 80
type: ClusterIP
1.3 httpbin-ApisixRoute.yaml
httpbin-deployment应用的apisix route,设置的域名为 httpbin.gentlewok.demo
代码语言:txt复制apiVersion: apisix.apache.org/v2
kind: ApisixRoute
metadata:
name: httpbin-route
spec:
http:
-
name: route-1
match:
hosts:
-
httpbin.gentlewok.demo
paths:
-
/*
backends:
- serviceName: httpbin
servicePort: 80</code></pre></div></div><p></p><h3 id="c33os" name="%E4%BA%8C%E3%80%81%E5%AE%89%E8%A3%85httpbin">二、安装httpbin</h3><h4 id="4p7aj" name="2.1-%E5%AE%89%E8%A3%85%E5%88%B0kubernetes">2.1 安装到kubernetes</h4><div class="rno-markdown-code"><div class="rno-markdown-code-toolbar"><div class="rno-markdown-code-toolbar-info"><div class="rno-markdown-code-toolbar-item is-type"><span class="is-m-hidden">代码语言:</span>txt</div></div><div class="rno-markdown-code-toolbar-opt"><div class="rno-markdown-code-toolbar-copy"><i class="icon-copy"></i><span class="is-m-hidden">复制</span></div></div></div><div class="developer-code-block"><pre class="prism-token token line-numbers language-txt"><code class="language-txt" style="margin-left:0">kubectl apply -f httpbin-deployment.yaml
kubectl apply -f httpbin-service.yaml
kubectl apply -f httpbin-ApisixRoute.yaml
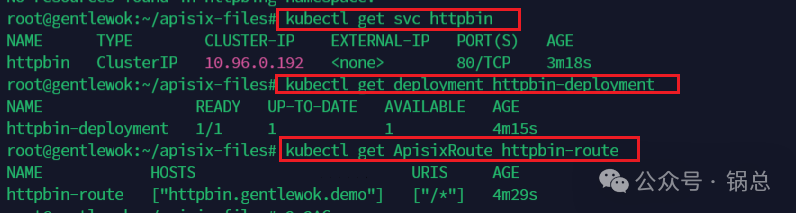
2.2 验证安装是否成功
代码语言:txt复制kubectl get svc httpbin
kubectl get deployment httpbin-deployment
kubectl get ApisixRoute httpbin-route
三、验证访问效果
3.1 本地写hosts
windows系统hosts文件位置在 C:\Windows\System32\drivers\etc\hosts
代码语言:txt复制服务器ip httpbin.gentlewok.demo
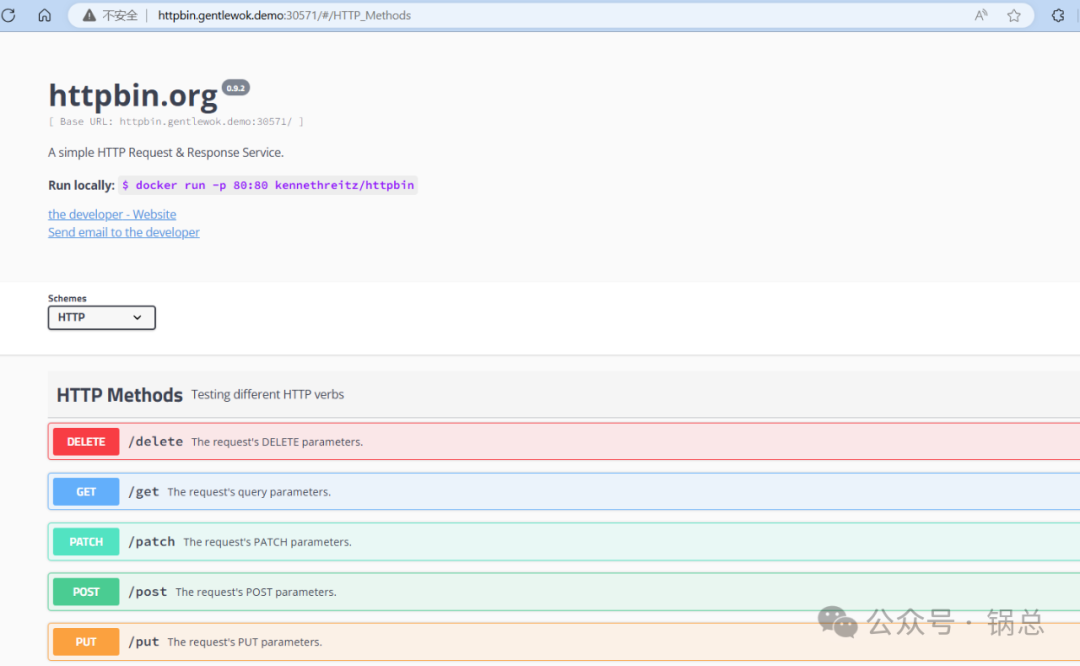
3.2 浏览器打开访问httpbin
地址:http://httpbin.gentlewok.demo:30571
本文演示是用的http,故选择ingress-apisix-gateway的nodeport 30571 端口

正常访问,安装成功