真的是,几乎没什么文章讲解helm安装jumpserver,jumpserver官方给的k8s安装方式就是helm
jumpserver官方文档
不想看我直接去看官方文档,希望你不会在返回来
1.环境准备
1)k8s集群
首先你肯定要有一个k8s集群,没有的看我之前的文章
之前的文章
我这里部署的版本为1.27.1版本

这都无所谓,照样带你们操作
2)nfs服务器
helm安装jumpserver需要动态存储,这里我们使用nfs,(用ceph也行)
这里安装看我nfs文档
nfs文档
2.基础服务部署
1)mysql
jumpserver需要数据库存储信息
这里手动给他创建起来,helm里没有mysql的创建文件,所以需要手动创建,mysql选择本地服务或者是pod运行都可以,这里我直接在pod里运行方便一点
apiVersion: apps/v1
kind: Deployment
metadata:
  name: mysql
  namespace: jumpserver
spec:
  selector:
    matchLabels:
      app: mysql
  replicas: 1
  template:
    metadata:
      labels:
        app: mysql
    spec:
      containers:
        - name: mysql
          args:
            - --character-set-server=utf8
          image: jumpserver/mysql:5
          imagePullPolicy: IfNotPresent
          env:
            - name: DB_PORT
              value: "3306"
            - name: MYSQL_DATABASE
              value: jumpserver              #容器起来时创建的库,给jumpserver服务用
            - name: MYSQL_ROOT_PASSWORD
              value: "Password123@mysql"     #设置的root密码
          ports:
            - containerPort: 3306            #端口
              protocol: TCP
          volumeMounts:
            - name: mysql-persistent-storage #数据目录
              mountPath: /var/lib/mysql
      volumes:
        - name: mysql-persistent-storage      #这里我直接挂载本地,没用动态存储,我把k8s两台node节点的mnt目录都挂载到nfs上了,这样的话我重启pod数据也不会丢失
          hostPath:
            path: /mnt/jenkins/jumpserver/mysql/data
---
apiVersion: v1
kind: Service
metadata:
  name: mysql
  namespace: jumpserver
spec:
  ports:
    - name: mysql
      protocol: TCP
      port: 3306
      targetPort: 3306
#      nodePort: 30306
#  type: NodePort
  selector:
    app: mysql
2)redis
redis也需要安装,不然jumpserver会起不来,这里也是在pod运行
apiVersion: apps/v1 kind: Deployment metadata: name: redis namespace: jumpserver spec: selector: matchLabels: app: redis replicas: 1 strategy: type: Recreate template: metadata: creationTimestamp: null labels: app: redis spec: containers: - name: redis args: - redis-server - /etc/redis.conf - --requirepass - redis@jumpserver@6379 env: - name: REDIS_PASSWORD value: redis@jumpserver@6379 #密码 - name: REDIS_PORT value: "6379" #端口 image: jumpserver/redis:6.2 imagePullPolicy: IfNotPresent volumeMounts: - name: redis-data #数据目录 mountPath: /data - name: redis-conf #配制文件 mountPath: /etc/redis.conf volumes: - name: redis-conf hostPath: #注意,redis这个镜像没有redis.conf这个配制文件,我这里是在宿主机创建好挂载进去的 path: /mnt/jenkins/jumpserver/redis/conf/redis.conf - name: redis-data hostPath: path: /mnt/jenkins/jumpserver/redis/data --- apiVersion: v1 kind: Service metadata: name: redis namespace: jumpserver spec: ports: - name: redis protocol: TCP port: 6379 targetPort: 6379 type: ClusterIP selector: app: redis#redis.conf配制文件
protected-mode no
port 6379
tcp-backlog 511
requirepass 000415
timeout 0
tcp-keepalive 300
daemonize no
supervised no
pidfile /var/run/redis_6379.pid
loglevel notice
logfile ""
databases 30
always-show-logo yes
save 900 1
save 300 10
save 60 10000
stop-writes-on-bgsave-error yes
rdbcompression yes
rdbchecksum yes
dbfilename dump.rdb
dir ./
replica-serve-stale-data yes
replica-read-only yes
repl-diskless-sync no
repl-disable-tcp-nodelay no
replica-priority 100
lazyfree-lazy-eviction no
lazyfree-lazy-expire no
lazyfree-lazy-server-del no
replica-lazy-flush no
appendonly yes
appendfilename "appendonly.aof"
no-appendfsync-on-rewrite no
auto-aof-rewrite-percentage 100
auto-aof-rewrite-min-size 64mb
aof-load-truncated yes
aof-use-rdb-preamble yes
lua-time-limit 5000
slowlog-max-len 128
notify-keyspace-events ""
hash-max-ziplist-entries 512
hash-max-ziplist-value 64
list-max-ziplist-size -2
list-compress-depth 0
set-max-intset-entries 512
zset-max-ziplist-entries 128
zset-max-ziplist-value 64
hll-sparse-max-bytes 3000
stream-node-max-bytes 4096
stream-node-max-entries 100
activerehashing yes
hz 10
dynamic-hz yes
aof-rewrite-incremental-fsync yes
rdb-save-incremental-fsync yes
准备好这两个文件直接启动就好
创建名称空间

kubectl create ns jumpserver

kubectl apply -f mysql.yaml

kubectl apply -f redis.yaml
等待一段时间后

可以看到两个数据库准备完毕
3)安装helm
helm官网

跟着上面来就ok
我下载的是这个

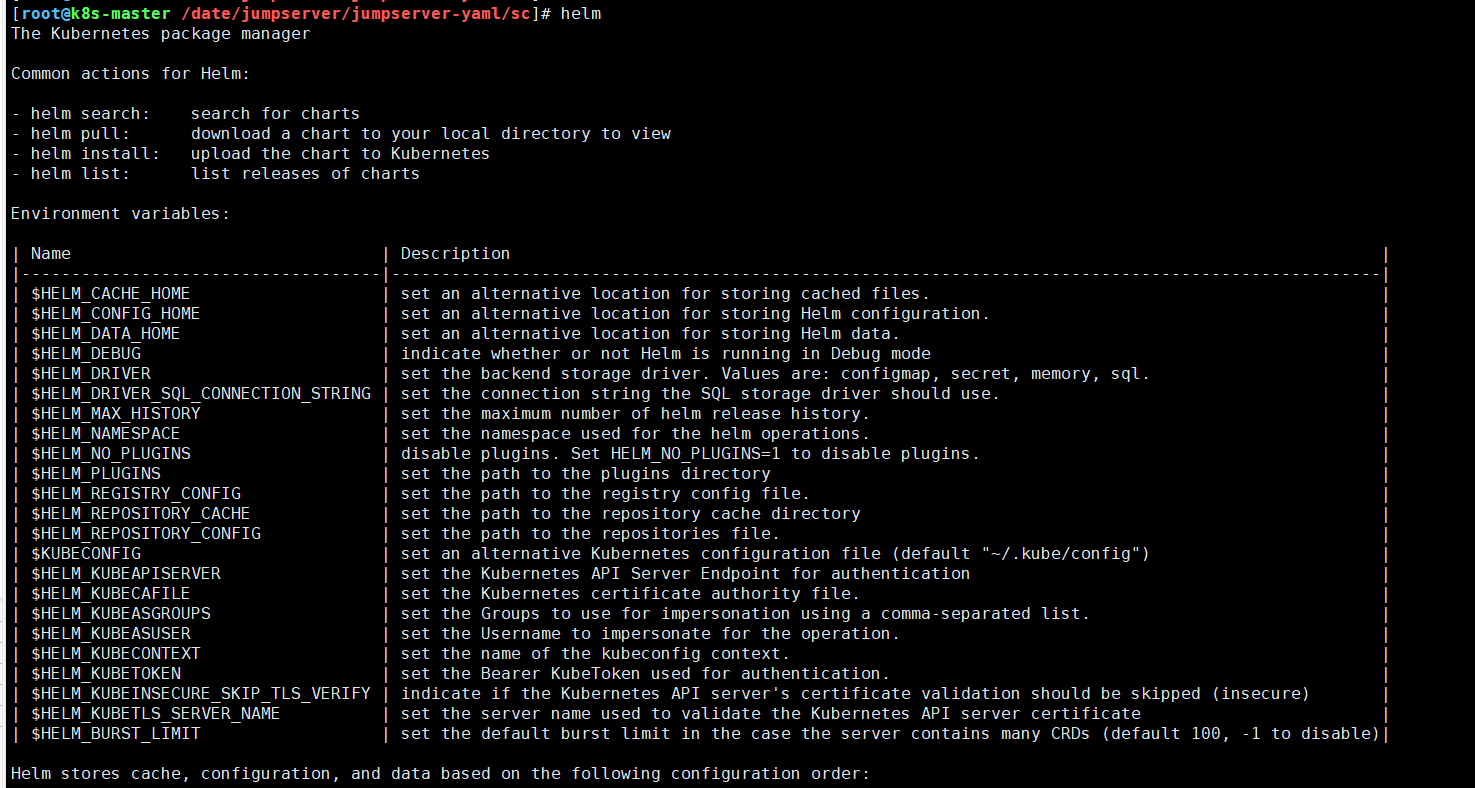
完成上述操作后输入helm,有提示命令就代表helm可以正常使用
4)部署nfs动态存储
一篇文章就是拼拼凑凑,咱也来个分布式文章发布
nfs动态看下面这篇文章,那当然也是我写的了!!!!
nfs动态存储部署
3.部署jumpserver
jumpserver官方文档
我这里部署的是v3版本
1)添加 JumpServer 的 Helm 源地址
helm repo add jumpserver https://jumpserver.github.io/helm-charts

helm repo list
2)
vi values.yaml用下面的配制也行,根据这个地址wget也行
模板 https://github.com/jumpserver/helm-charts/blob/main/charts/jumpserver/values.yaml
Default values for jumpserver.
This is a YAML-formatted file.
Declare variables to be passed into your templates.
nameOverride: ""
fullnameOverride: ""@param global.imageRegistry Global Docker image registry
@param global.imagePullSecrets Global Docker registry secret names as an array
@param global.storageClass Global StorageClass for Persistent Volume(s)
@param global.redis.password Global Redis™ password (overrides
auth.password)global:
imageRegistry: "docker.io" # 千万别听他的用国内的,那真是一点都下载不下来
imageTag: v3.3.1 # 版本号E.g.
imagePullSecrets:
- name: harborsecret
storageClass: "jumpserver-data"
imagePullSecrets: []
# - name: yourSecretKey
storageClass: "storageclass1" # (*必填) NFS SC(刚创建好的sc,你别说你忘了)Please configure your MySQL server first
Jumpserver will not start the external MySQL server.
externalDatabase: # (*必填) 数据库相关设置(写本地mysql也行,写pod mysql也行,我这里写的pod)
engine: mysql
host: mysql.jumpserver.svc.cluster.local #k8s自带的dns,格式mysqlscv名字,名称空间名字.svc.cluster.local
port: 3306 #端口
user: root #用户
password: "" #密码
database: jumpserver #库名Please configure your Redis server first
Jumpserver will not start the external Redis server.
externalRedis: # (*必填) Redis 设置
host: redis.jumpserver.svc.cluster.local
port: 6379
password: ""serviceAccount:
Specifies whether a service account should be created
create: false
The name of the service account to use.
If not set and create is true, a name is generated using the fullname template
name:
ingress:
enabled: false # 不使用 ingress 可以关闭(我这里给他关闭了,一会咱手动创建)
annotations:
# kubernetes.io/tls-acme: "true"
compute-full-forwarded-for: "true"
use-forwarded-headers: "true"
kubernetes.io/ingress.class: nginx
nginx.ingress.kubernetes.io/configuration-snippet: |
proxy_set_header Upgrade "websocket";
proxy_set_header Connection "Upgrade";
hosts:
- "test.jumpserver.org" # 对外域名
tls: []- secretName: chart-example-tls
hosts:
- chart-example.local
core:
enabled: truelabels:
app.jumpserver.org/name: jms-coreconfig:
# Generate a new random secret key by executecat /dev/urandom | tr -dc A-Za-z0-9 | head -c 50
# secretKey: "B3f2w8P2PfxIAS7s4URrD9YmSbtqX4vXdPUL217kL9XPUOWrmy"
secretKey: "" # (*必填) 加密敏感信息的 secret_key, 长度推荐大于 50 位 (这玩意自己随便填就行,记好了就行,)
# Generate a new random bootstrap token by executecat /dev/urandom | tr -dc A-Za-z0-9 | head -c 16
# bootstrapToken: "7Q11Vz6R2J6BLAdO"
bootstrapToken: "" # (*必填) 组件认证使用的 token, 长度推荐大于 24 位 (这也是随便填,记好了就行)
# Enabled it for debug
debug: false
log:
level: ERRORreplicaCount: 1
image:
registry: docker.io
repository: jumpserver/core
tag: v3.3.1
pullPolicy: IfNotPresentcommand: []
env:
# See: https://docs.jumpserver.org/zh/master/admin-guide/env/#core
SESSION_EXPIRE_AT_BROWSER_CLOSE: true
# SESSION_COOKIE_AGE: 86400
# SECURITY_VIEW_AUTH_NEED_MFA: truelivenessProbe:
failureThreshold: 30
httpGet:
path: /api/health/
port: webreadinessProbe:
failureThreshold: 30
httpGet:
path: /api/health/
port: webpodSecurityContext: {}
# fsGroup: 2000securityContext: {}
# capabilities:
# drop:
# - ALL
# readOnlyRootFilesystem: true
# runAsNonRoot: true
# runAsUser: 1000service:
type: ClusterIP
web:
port: 8080resources: {}
# We usually recommend not to specify default resources and to leave this as a conscious
# choice for the user. This also increases chances charts run on environments with little
# resources, such as Minikube. If you do want to specify resources, uncomment the following
# lines, adjust them as necessary, and remove the curly braces after 'resources:'.
# limits:
# cpu: 1000m
# memory: 2048Mi
# requests:
# cpu: 500m
# memory: 1024Mipersistence:
storageClassName: jumpserver-data
accessModes:
- ReadWriteMany #注意,这里用ceph做动态存储的把这个参数改成ReadWriteOnce (单机访问,不然创建出来会报错,pvc),不止这里,下面还有
size: 100Gi
# annotations: {}
finalizers:
- kubernetes.io/pvc-protection
# subPath: ""
# existingClaim:volumeMounts: []
volumes: []
nodeSelector: {}
tolerations: []
affinity: {}
koko:
enabled: truelabels:
app.jumpserver.org/name: jms-kokoconfig:
log:
level: ERRORreplicaCount: 1
image:
registry: docker.io
repository: jumpserver/koko
tag: v3.3.1
pullPolicy: IfNotPresentcommand: []
env: []
# See: https://docs.jumpserver.org/zh/master/admin-guide/env/#koko
# LANGUAGE_CODE: zh
# REUSE_CONNECTION: true
# ENABLE_LOCAL_PORT_FORWARD: true
# ENABLE_VSCODE_SUPPORT: truelivenessProbe:
failureThreshold: 30
httpGet:
path: /koko/health/
port: webreadinessProbe:
failureThreshold: 30
httpGet:
path: /koko/health/
port: webpodSecurityContext: {}
# fsGroup: 2000securityContext:
privileged: true
# capabilities:
# drop:
# - ALL
# readOnlyRootFilesystem: true
# runAsNonRoot: true
# runAsUser: 1000service:
type: ClusterIP
web:
port: 5000
ssh:
port: 2222resources: {}
# We usually recommend not to specify default resources and to leave this as a conscious
# choice for the user. This also increases chances charts run on environments with little
# resources, such as Minikube. If you do want to specify resources, uncomment the following
# lines, adjust them as necessary, and remove the curly braces after 'resources:'.
# limits:
# cpu: 100m
# memory: 128Mi
# requests:
# cpu: 100m
# memory: 128Mipersistence:
storageClassName: jumpserver-data
accessModes:
- ReadWriteMany #这里用ceph做动态存储的把这个参数改成ReadWriteOnce
size: 10Gi
# annotations: {}
finalizers:
- kubernetes.io/pvc-protectionvolumeMounts: []
volumes: []
nodeSelector: {}
tolerations: []
affinity: {}
lion:
enabled: truelabels:
app.jumpserver.org/name: jms-lionconfig:
log:
level: ERRORreplicaCount: 1
image:
registry: docker.io
repository: jumpserver/lion
tag: v3.3.1
pullPolicy: IfNotPresentcommand: []
env:
# See: https://docs.jumpserver.org/zh/master/admin-guide/env/#lion
JUMPSERVER_ENABLE_FONT_SMOOTHING: true
# JUMPSERVER_COLOR_DEPTH: 32
# JUMPSERVER_ENABLE_WALLPAPER: true
# JUMPSERVER_ENABLE_THEMING: true
# JUMPSERVER_ENABLE_FULL_WINDOW_DRAG: true
# JUMPSERVER_ENABLE_DESKTOP_COMPOSITION: true
# JUMPSERVER_ENABLE_MENU_ANIMATIONS: truelivenessProbe:
failureThreshold: 30
httpGet:
path: /lion/health/
port: webreadinessProbe:
failureThreshold: 30
httpGet:
path: /lion/health/
port: webpodSecurityContext: {}
# fsGroup: 2000securityContext: {}
# capabilities:
# drop:
# - ALL
# readOnlyRootFilesystem: true
# runAsNonRoot: true
# runAsUser: 1000service:
type: ClusterIP
web:
port: 8081resources: {}
# We usually recommend not to specify default resources and to leave this as a conscious
# choice for the user. This also increases chances charts run on environments with little
# resources, such as Minikube. If you do want to specify resources, uncomment the following
# lines, adjust them as necessary, and remove the curly braces after 'resources:'.
# limits:
# cpu: 100m
# memory: 512Mi
# requests:
# cpu: 100m
# memory: 512Mipersistence:
storageClassName: jumpserver-data
accessModes:
- ReadWriteMany
size: 50Gi
# annotations: {}
finalizers:
- kubernetes.io/pvc-protectionvolumeMounts: []
volumes: []
nodeSelector: {}
tolerations: []
affinity: {}
magnus:
enabled: truelabels:
app.jumpserver.org/name: jms-magnusconfig:
log:
level: ERRORreplicaCount: 1
image:
registry: docker.io
repository: jumpserver/magnus
tag: v3.3.1
pullPolicy: IfNotPresentcommand: []
env: []
livenessProbe:
failureThreshold: 30
tcpSocket:
port: 9090readinessProbe:
failureThreshold: 30
tcpSocket:
port: 9090podSecurityContext: {}
# fsGroup: 2000securityContext: {}
# capabilities:
# drop:
# - ALL
# readOnlyRootFilesystem: true
# runAsNonRoot: true
# runAsUser: 1000service:
type: ClusterIP
mysql:
port: 33061
mariadb:
port: 33062
redis:
port: 63790
postgresql:
port: 54320
oracle:
ports: 30000-30100resources: {}
# We usually recommend not to specify default resources and to leave this as a conscious
# choice for the user. This also increases chances charts run on environments with little
# resources, such as Minikube. If you do want to specify resources, uncomment the following
# lines, adjust them as necessary, and remove the curly braces after 'resources:'.
# limits:
# cpu: 100m
# memory: 512Mi
# requests:
# cpu: 100m
# memory: 512Mipersistence:
storageClassName: jumpserver-data
accessModes:
- ReadWriteMany #这里用ceph做动态存储的把这个参数改成ReadWriteOnce
size: 10Gi
# annotations: {}
finalizers:
- kubernetes.io/pvc-protectionvolumeMounts: []
volumes: []
nodeSelector: {}
tolerations: []
affinity: {}
xpack:
enabled: false # 企业版本打开此选项omnidb:
labels:
app.jumpserver.org/name: jms-omnidbconfig:
log:
level: ERRORreplicaCount: 1
image:
registry: registry.fit2cloud.com
repository: jumpserver/omnidb
tag: v3.3.1
pullPolicy: IfNotPresentcommand: []
env: []
livenessProbe:
failureThreshold: 30
tcpSocket:
port: webreadinessProbe:
failureThreshold: 30
tcpSocket:
port: webpodSecurityContext: {}
# fsGroup: 2000securityContext: {}
# capabilities:
# drop:
# - ALL
# readOnlyRootFilesystem: true
# runAsNonRoot: true
# runAsUser: 1000service:
type: ClusterIP
web:
port: 8082resources: {}
# We usually recommend not to specify default resources and to leave this as a conscious
# choice for the user. This also increases chances charts run on environments with little
# resources, such as Minikube. If you do want to specify resources, uncomment the following
# lines, adjust them as necessary, and remove the curly braces after 'resources:'.
# limits:
# cpu: 100m
# memory: 128Mi
# requests:
# cpu: 100m
# memory: 128Mipersistence:
storageClassName: jumpserver-data
accessModes:
- ReadWriteMany
size: 10Gi
# annotations: {}
finalizers:
- kubernetes.io/pvc-protectionvolumeMounts: []
volumes: []
nodeSelector: {}
tolerations: []
affinity: {}
razor:
labels:
app.jumpserver.org/name: jms-razorconfig:
log:
level: ERRORreplicaCount: 1
image:
registry: registry.fit2cloud.com
repository: jumpserver/razor
tag: v2.28.6
pullPolicy: IfNotPresentcommand: []
env: []
livenessProbe:
failureThreshold: 30
tcpSocket:
port: rdpreadinessProbe:
failureThreshold: 30
tcpSocket:
port: rdppodSecurityContext: {}
# fsGroup: 2000securityContext: {}
# capabilities:
# drop:
# - ALL
# readOnlyRootFilesystem: true
# runAsNonRoot: true
# runAsUser: 1000service:
type: ClusterIP
rdp:
port: 3389resources: {}
# We usually recommend not to specify default resources and to leave this as a conscious
# choice for the user. This also increases chances charts run on environments with little
# resources, such as Minikube. If you do want to specify resources, uncomment the following
# lines, adjust them as necessary, and remove the curly braces after 'resources:'.
# limits:
# cpu: 100m
# memory: 128Mi
# requests:
# cpu: 100m
# memory: 128Mipersistence:
storageClassName: jumpserver-data
accessModes:
- ReadWriteMany #这里用ceph做动态存储的把这个参数改成ReadWriteOnce
size: 50Gi
# annotations: {}
finalizers:
- kubernetes.io/pvc-protectionvolumeMounts: []
volumes: []
nodeSelector: {}
tolerations: []
affinity: {}
web:
enabled: truelabels:
app.jumpserver.org/name: jms-webreplicaCount: 1
image:
registry: docker.io
repository: jumpserver/web
tag: v3.3.1
pullPolicy: IfNotPresentcommand: []
env: []
# nginx client_max_body_size, default 4G
# CLIENT_MAX_BODY_SIZE: 4096mlivenessProbe:
failureThreshold: 30
httpGet:
path: /api/health/
port: webreadinessProbe:
failureThreshold: 30
httpGet:
path: /api/health/
port: webpodSecurityContext: {}
# fsGroup: 2000securityContext: {}
# capabilities:
# drop:
# - ALL
# readOnlyRootFilesystem: true
# runAsNonRoot: true
# runAsUser: 1000service:
type: ClusterIP
web:
port: 80resources: {}
# We usually recommend not to specify default resources and to leave this as a conscious
# choice for the user. This also increases chances charts run on environments with little
# resources, such as Minikube. If you do want to specify resources, uncomment the following
# lines, adjust them as necessary, and remove the curly braces after 'resources:'.
# limits:
# cpu: 100m
# memory: 128Mi
# requests:
# cpu: 100m
# memory: 128Mipersistence:
storageClassName: jumpserver-data
accessModes:
- ReadWriteMany
size: 1Gi
# annotations: {}
finalizers:
- kubernetes.io/pvc-protectionvolumeMounts: []
volumes: []
nodeSelector: {}
tolerations: []
affinity: {}
保存退出
3)安装 JumpServer
helm install jms-k8s jumpserver/jumpserver -n jumpserver -f values.yaml
等半天提示这个,表示网不行,毕竟是github,咱们手动给他拉下来
复制那个地址到浏览器访问
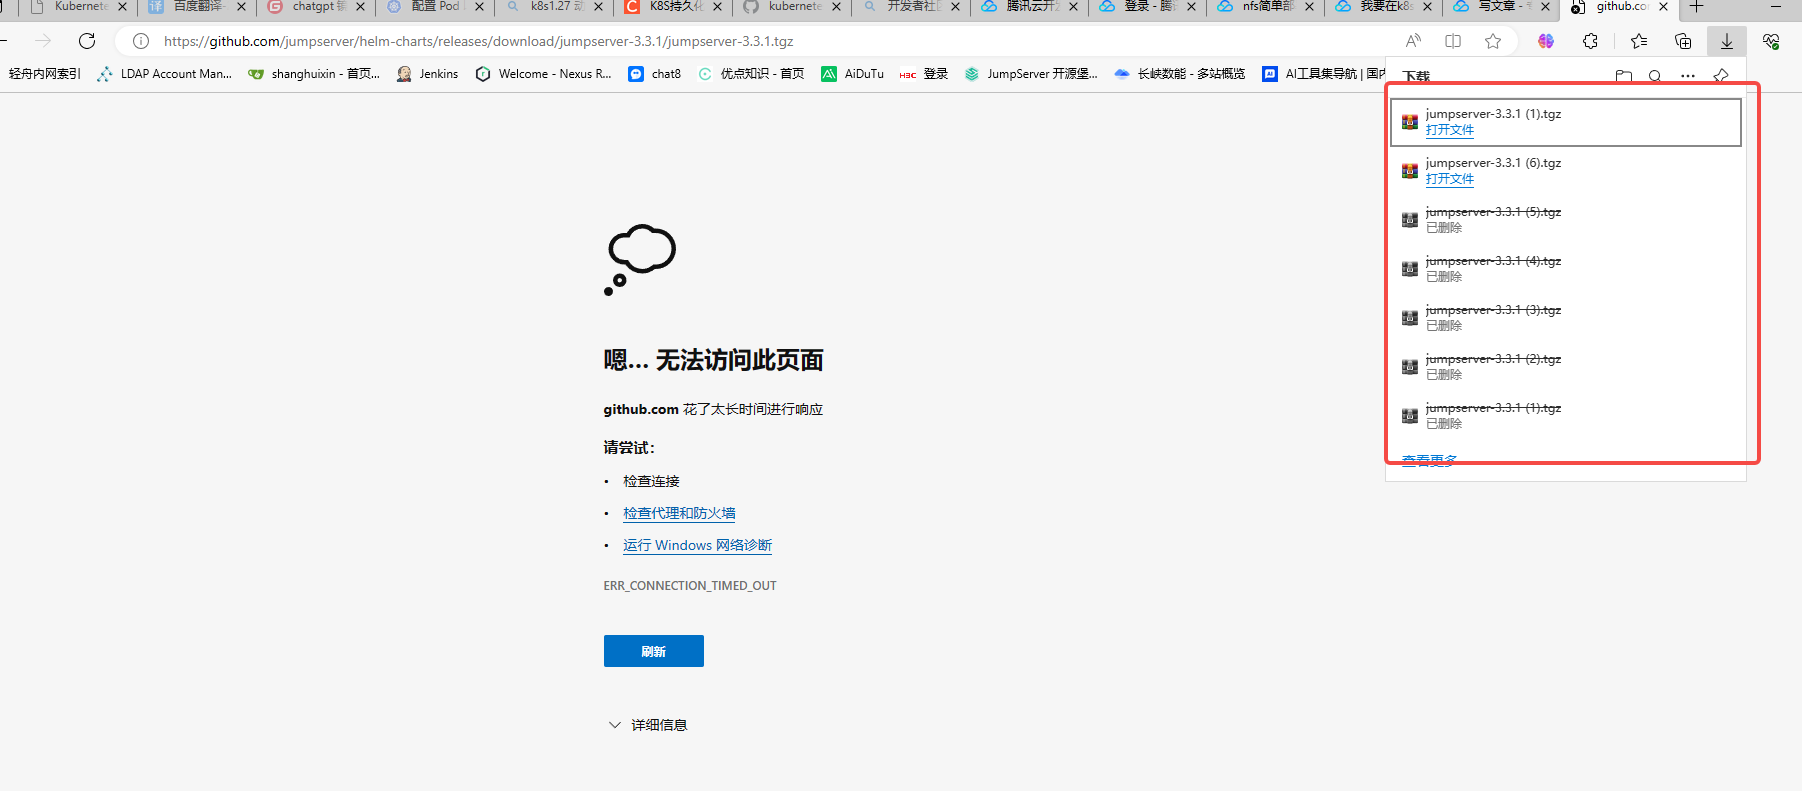
手动传入到机器内

不用解压,你想解压也可以,看看人家写的什么
把源换成刚下载下来的包执行命令

helm install jms-k8s jumpserver-3.3.1.tgz -n jumpserver -f values.yaml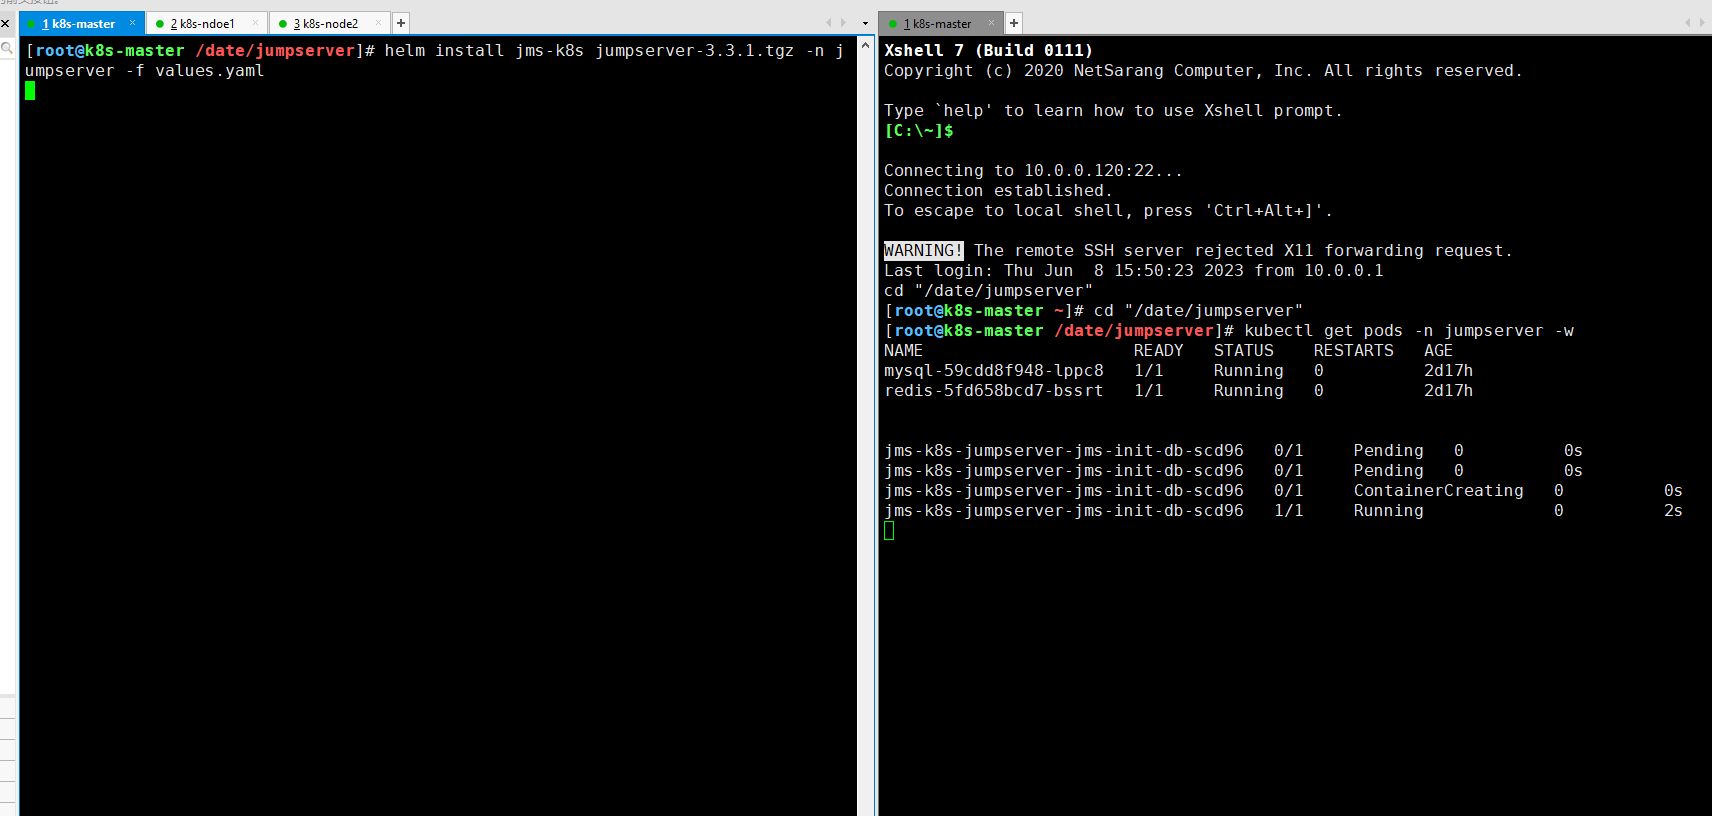
执行完之后首先他会起一个他内置数据库的pod,会running状态,如果是别的状态建议看看是不是镜像没下载下来
这里他会等很长时间
原因:他会把他内置的这个数据库里的信息导入到你配置的mysql里,传输完成后他会自动销毁,这是个job,一次性任务,如果还没销毁也千万别着急,看看左面提示什么,提示超时并任务结束可以进行一下操作
helm delete jms-k8s -n jumpserver

删除helm任务

会提示没删除pvc,不用管

再次执行

helm install jms-k8s jumpserver-3.3.1.tgz -n jumpserver -f values.yaml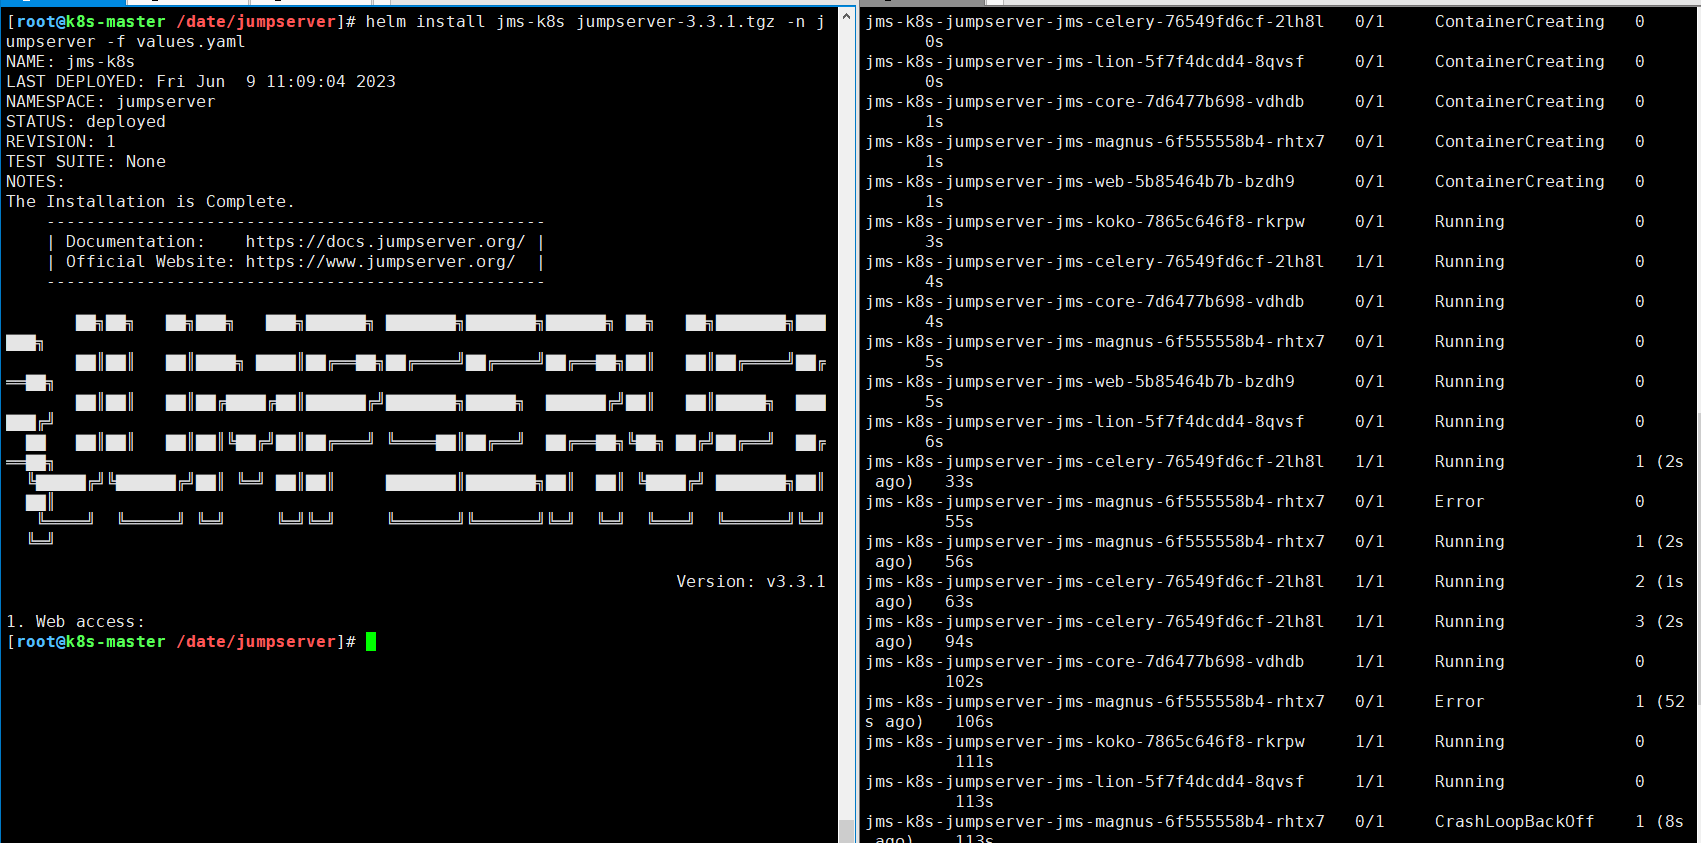
他这个logo出来了就证明部署完了,剩下的问题就是k8s内部的问题了,我这里是直接成功完成

一个小问题,可以看到这个celery pod一直在重启
如果没报错一直是running状态就不用管他
如果报错了就编辑
kubectl edit deployments.apps -n jumpserver jms-k8s-jumpserver-jms-celery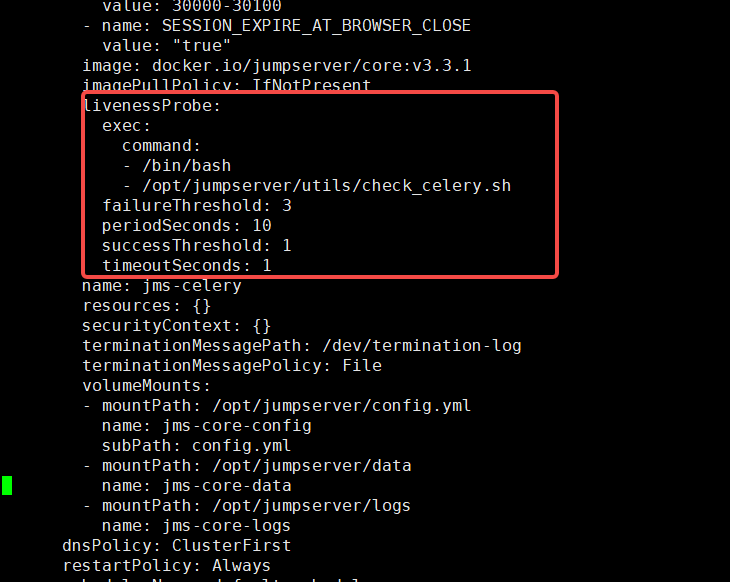
把这个探针给注释掉,没啥用,就是检查/tmp/下的文件
如果你是自己虚拟机部署的,请把node节点的内存给大一点,不然node会掉线,我这里给了8G

找到web pod的ip在本地curl测试


这样基本就部署好了
4)部署ingress
这里我是用的是traefik控制器
traefik官网
直接看yaml文件
rbac
kind: ClusterRole
apiVersion: rbac.authorization.k8s.io/v1
metadata:
name: traefik-role
rules:
- apiGroups:
- ""
resources:
- services
- endpoints
- secrets
verbs:
- get
- list
- watch
- apiGroups:
- extensions
- networking.k8s.io
resources:
- ingresses
- ingressclasses
verbs:
- get
- list
- watch
- apiGroups:
- extensions
- networking.k8s.io
resources:
- ingresses/status
verbs:
- update
apiVersion: v1
kind: ServiceAccount
metadata:
name: traefik-account
namespace: jumpserver #名称空间
kind: ClusterRoleBinding
apiVersion: rbac.authorization.k8s.io/v1
metadata:
name: traefik-role-binding
roleRef:
apiGroup: rbac.authorization.k8s.io
kind: ClusterRole
name: traefik-role
subjects:
kind: ServiceAccount

name: traefik-account

namespace: jumpserver        名称空间
traefik
kind: DaemonSet
apiVersion: apps/v1
metadata:
name: traefik-deployment
namespace: jumpserver #名称空间
labels:
app: traefikspec:
selector:
matchLabels:
app: traefik
template:
metadata:
labels:
app: traefik
spec:
serviceAccountName: traefik-account
containers:
- name: traefik
image: traefik:v2.10
args:
- --api.insecure
- --providers.kubernetesingress
ports:
- name: web
containerPort: 80
- name: dashboard
containerPort: 8080
apiVersion: v1
kind: Service
metadata:
name: traefik-dashboard-service
namespace: jumpserver #名称空间
spec:
type: NodePort
ports:
- port: 8080
targetPort: dashboard
nodePort: 8080
selector:
app: traefik
apiVersion: v1
kind: Service
metadata:
name: traefik-web-service
namespace: jumpserver #名称空间
spec:
type: NodePort
ports:
- targetPort: web
port: 80
nodePort: 8000
selector:
app: traefik
ingress
apiVersion: networking.k8s.io/v1

kind: Ingress

metadata:

name: jump-ingress

namespace: jumpserver      #名称空间
spec:

rules:
host: dgds.jumpserver.com           #你要设置的域名

http:

paths:
path: /
pathType: Prefix
backend:
service:
name: jms-k8s-jumpserver-jms-web #jumpserver web pod的svc名字
port:
number: 80 #jumpserver web pod的svc的端口
kubectl apply -f这几个yaml文件
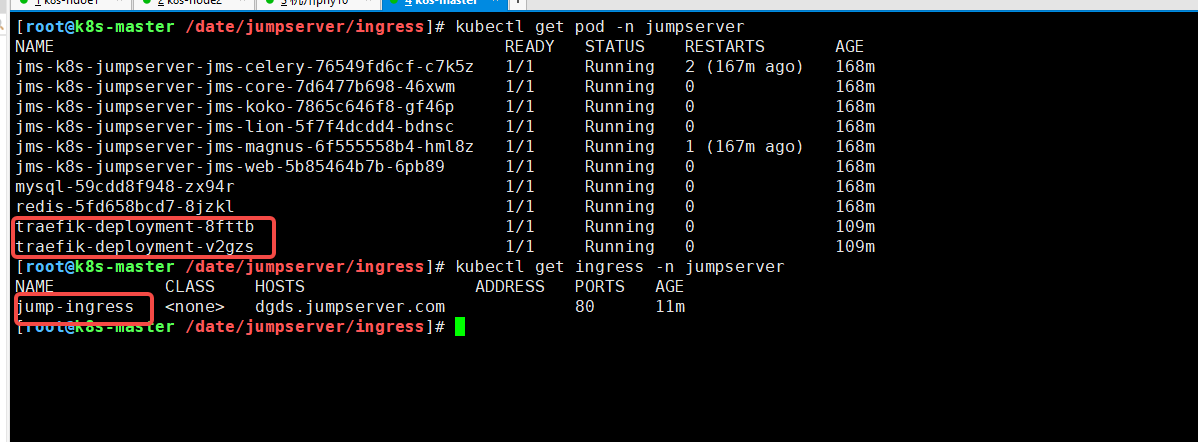
启动成功
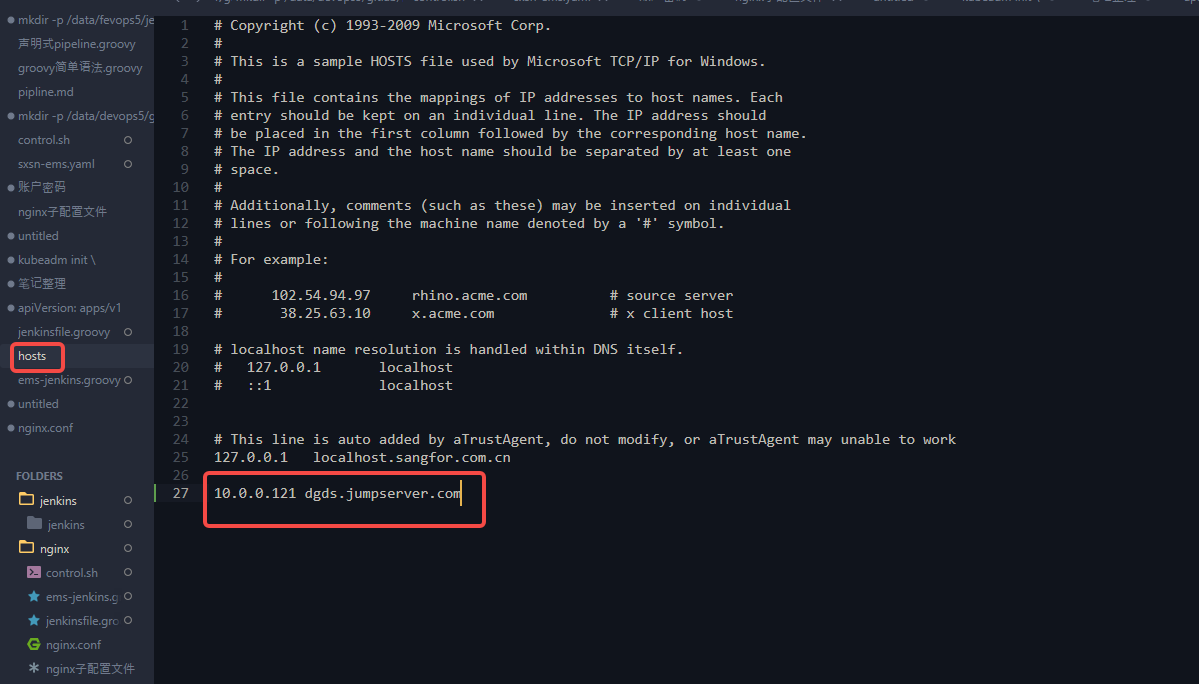
在window hosts文件添加解析并保存
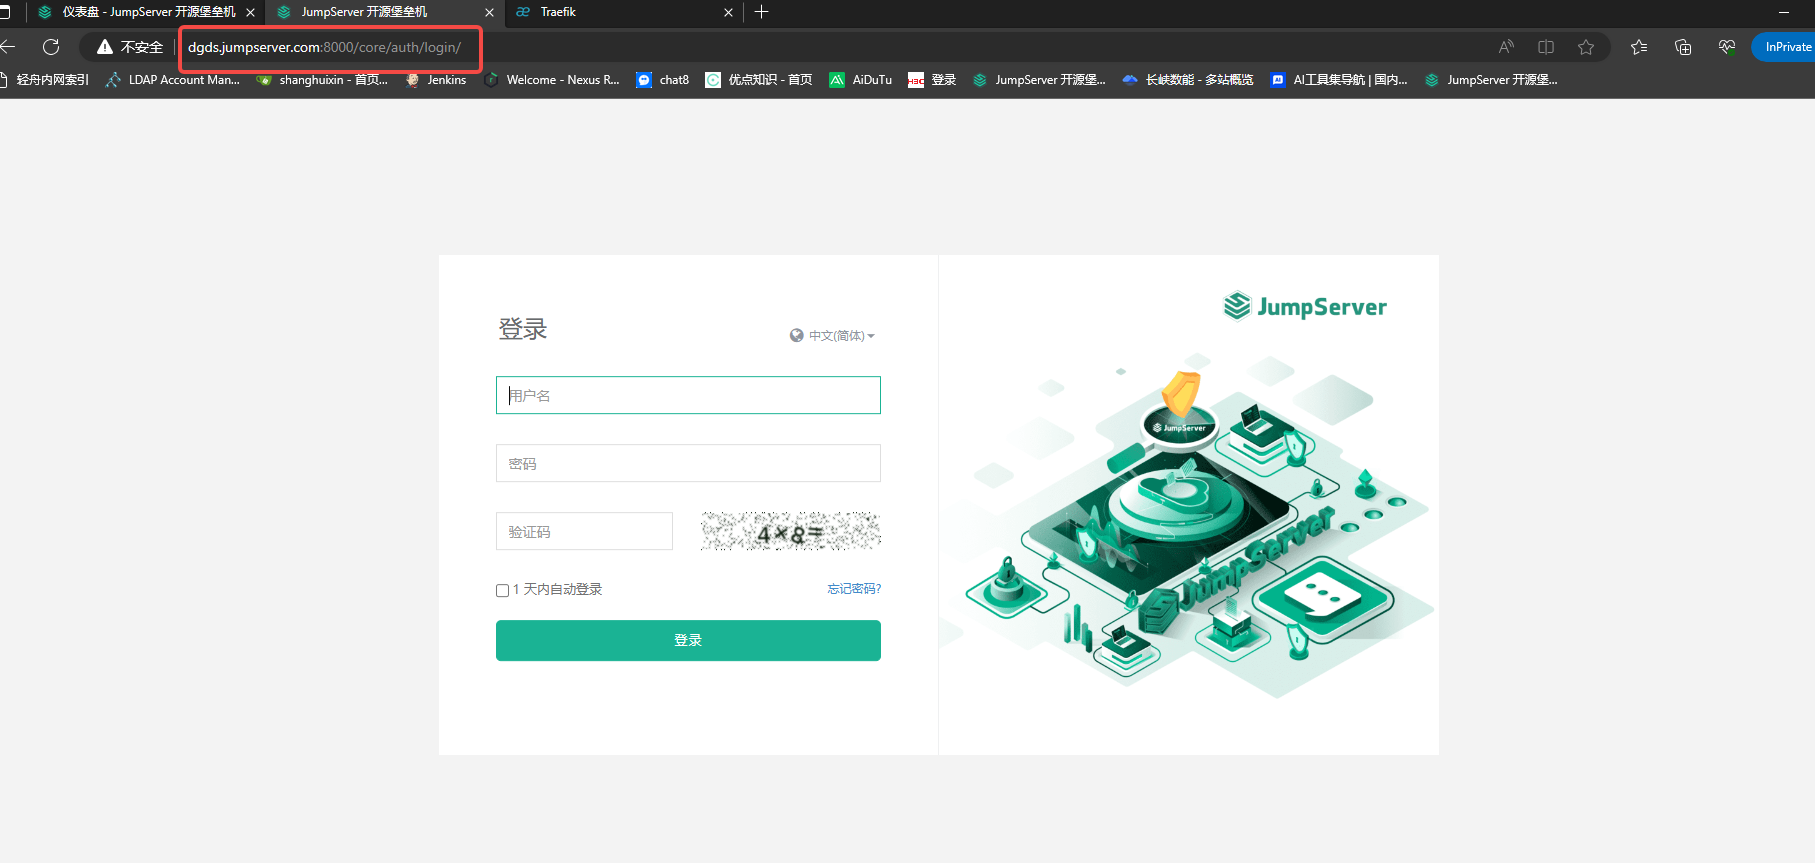
访问成功,不成功来我评论区@我,我亲自给你搞
初始用户密码都是admin
更改密码
进入
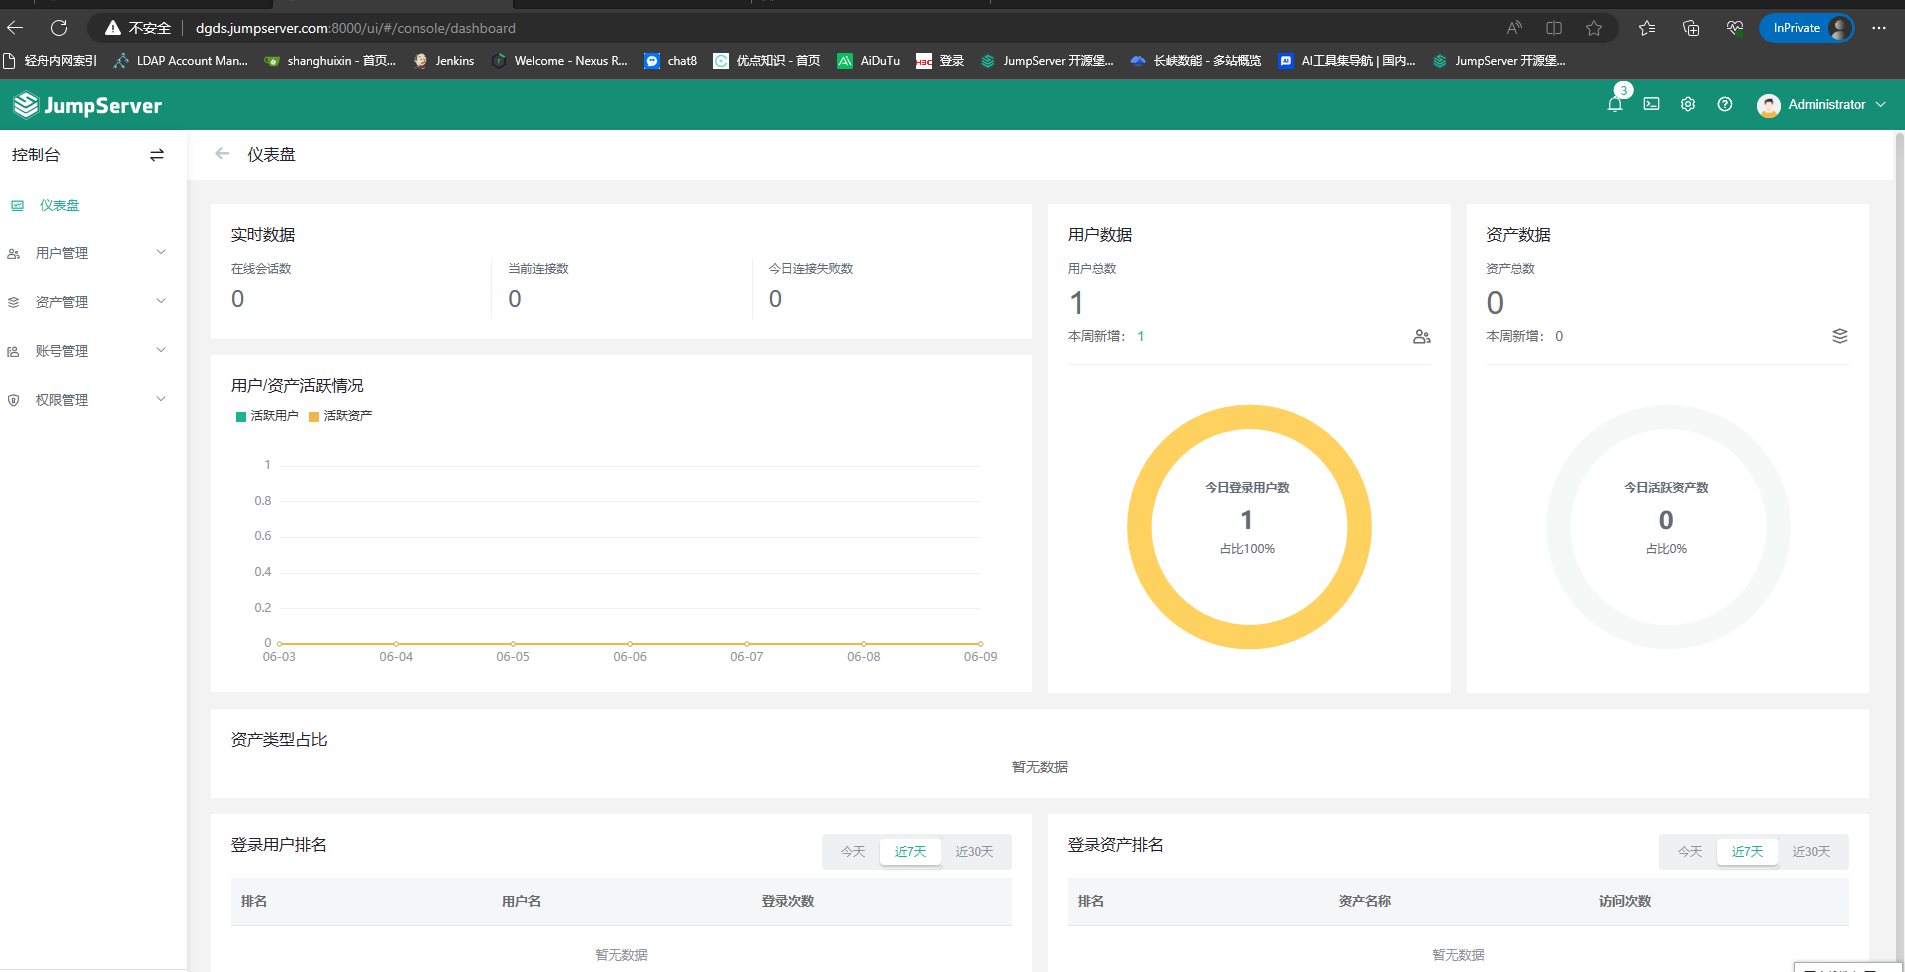
ok了家人们
完事
traefik自带web界面
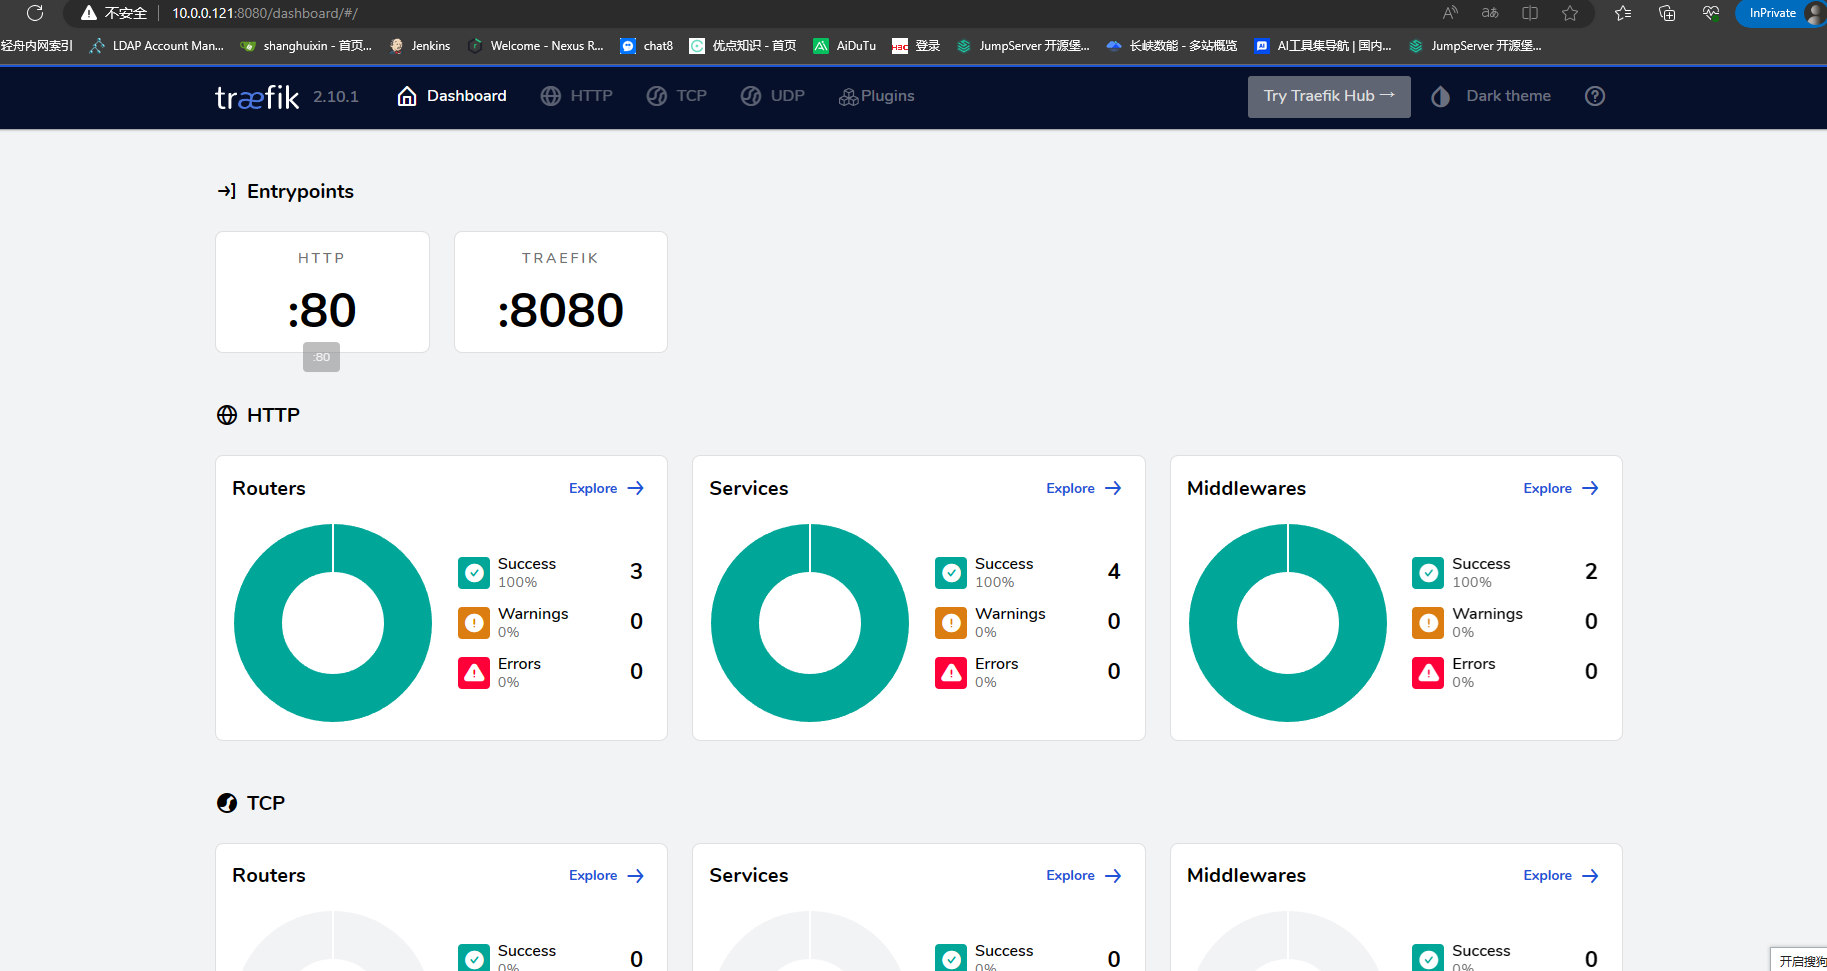
你可别用域名访问,域名访问也行,在ingress吧8080端口加上就ok了
撒花结束