概述
重新拾起我两年期的笔记,以面向运维开发的角度,在裸辞期间,继续学习前端开发,目标能把LLM的机器人和前端互动结合起来
项目代码 https://github.com/svc-design/Vue3-demo.git
01-Vue3 开发环境
准备工作
- 服务端 CentOS7
- 软件 git,docker-ce,nodejs-v14, make
- 本地代码编辑工具 vscode 可选
安装Nodejs和 Vue 3.0
wget https://nodejs.org/dist/v14.17.3/node-v14.17.3-linux-x64.tar.xz
tar -xvpf node-v14.17.3-linux-x64.tar.xz
ln -sv /data/node-v14.17.3-linux-x64/bin/node /usr/bin/node -f
ln -sv /data/node-v14.17.3-linux-x64/bin/npm /usr/bin/npm -f
ln -sv /data/node-v14.17.3-linux-x64/bin/npx /usr/bin/npx -f
npm config set registry https://registry.npm.taobao.org
npm install @vue/cli -g
ln -sv /data/node-v14.17.3-linux-x64/bin/vue /usr/bin/vue -f
创建 Vue 项目和初始化开发环境
vue create vue3-project- vue-cli向导会提示选择vue版本,这里选择 vue3Vue CLI v4.5.13 ? Please pick a preset: Default (Vue 2 babel, eslint) ❯ Default (Vue 3) (Vue 3 babel, eslint) Manually select features
- 其他默认即可,初始化完成后,会返回如下信息:
Vue CLI v4.5.13 ✨ Creating project in /data/demo-project. ⚙️ Installing CLI plugins. This might take a while...added 1276 packages in 35s
🚀 Invoking generators...
📦 Installing additional dependencies...added 81 packages in 5s
⚓ Running completion hooks...📄 Generating README.md...
🎉 Successfully created project demo-project ...
本地测试
进入项目源码目录,执行命令: cd /data/demo-project && npm run serve
DONE Compiled successfully in 2552ms 7:45:25 AMApp running at:
- Local: http://localhost:8080/
- Network: http://10.9.76.113/
Note that the development build is not optimized.
To create a production build, run npm run build.
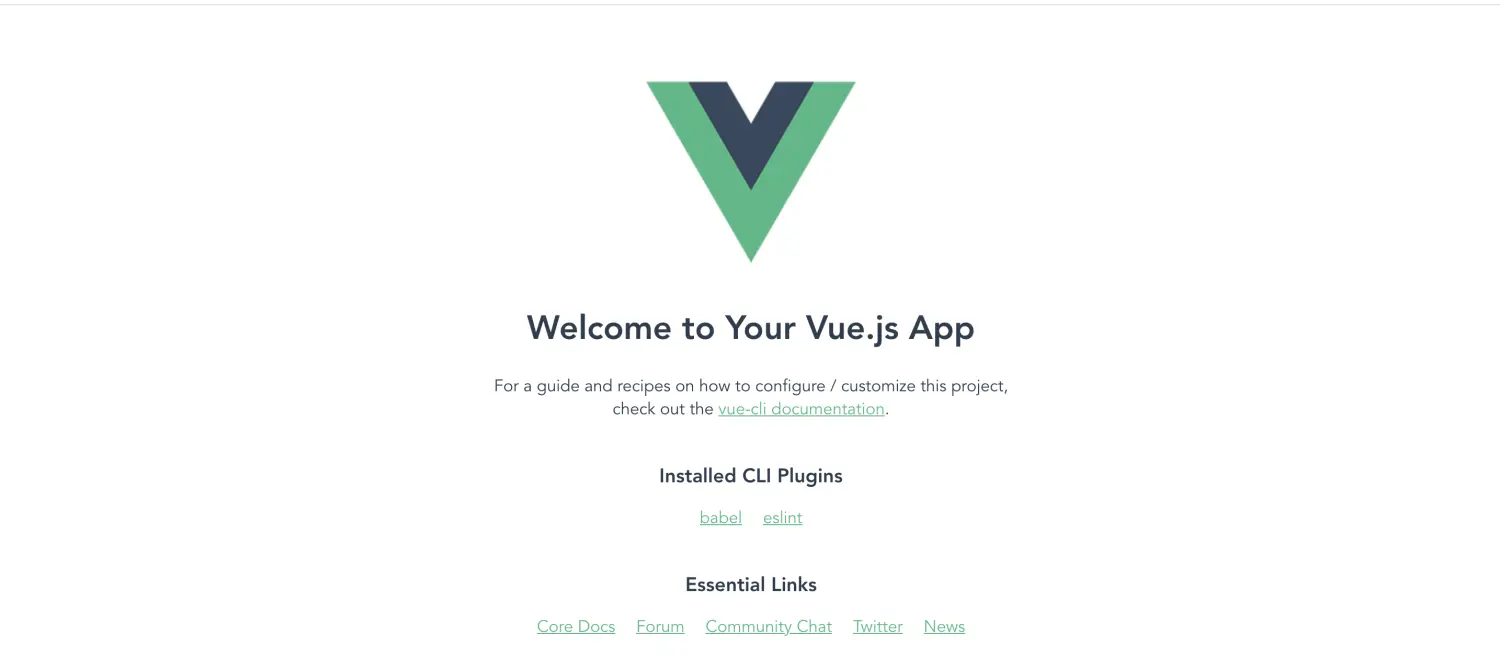
- 打开浏览器访问地址,可以看到显示 vue app页面

构建容器镜像
- 进入项目目录demo-project,创建Dockerfile
# build stage
FROM node:lts-alpine as build-stage
WORKDIR /app
COPY package*.json ./
RUN npm install
COPY . .
RUN npm run buildproduction stage
FROM nginx:stable-alpine as production-stage
COPY --from=build-stage /app/dist /usr/share/nginx/html
EXPOSE 80
CMD ["nginx", "-g", "daemon off;"]
- 进入项目目录demo-project,创建Makefile
all: run

build:

docker build -t vuejs-app:latest .

run: build

docker run -d -t -i --network host --name vuejs-app-prd vuejs-app- 进入项目目录demo-project
- 执行命令 make 构建镜像并运行,运行成功后,
- 浏览器访问服务器地址,验证功能
- 将验证过的 Dockerfile Makefile 提交,推送到远端Git仓库
git add  Dockerfile Makefile

git commit -m "add Dockerfile Makefile" Dockerfile Makefile

git remote add origin git@github.com:xxxx/xxx.git

git push -u origin main- 后续src目录新增vue js 代码,安装新的node模块,重新进入测试,验证,代码提交的循环即可!
npm install vue-router@4 --save

vim src/main.js

vim src/router.js

vim src/components/Home.vue

...

git commit -m "Home.vue: add New component"

git push
02-从读懂第一个页面代码开始
前置知识
准备开始使用 Vue3开发,需要具备一定的基础知识
- 了解什么是HTML: 超文本标记语言,用来写网页的基本结构,建议了解 HTML 5
- 了解什么是 CSS : 层叠样式表,用来让你的页面更加生动和好看,建议了解 CSS 3
- 了解什么是JavaScript : 简称"JS",解释性或即时编译型的高级编程语言,建议了解 JavaScript ES6 规范
Vue3项目目录结构
使用vue-cli 执行命令 vue create demo-project 会生成一个项目模版目录,默认目录结构和说明如下:
README.md             默认的说明文件,主要是描述 npm 命令的参考使用

babel.config.js       babel的配置文件

node_modules          插件安装包的内容

package-lock.json

package.json          npm包配置文件,主要包含一些启动脚本和依赖关系

public                项目基础的html文件等

src 开发目录,编码工作基本都是在这个目录下进行- 其中src目录说明如下:
├── App.vue              # vue主文件

├── assets               # 静态文件目录

│   └── logo.png

├── components           # 自定义组件

│   └── HelloWorld.vue

└── main.js              # js主文件
代码调用关系
第一个Web应用 http://127.0.0.1 页面的对应的Vue 代码调用关系如下:
main.js -> App.vue -> components/HelloWorld.vue
main.js 解读
import { createApp } from 'vue'    // 引入 createApp 方法

import App from './App.vue'        // 引入 App.vue 文件
createApp(App).mount('#app')       // 实例化 App 将渲染后内容挂在到id为app的标签下
在执行 npm run serve 浏览器访问: http://127.0.0.1 看到第一个vue页面,以Chrome浏览器为例点击 更多工具 -> 开发者工具,可以看到createApp(App).mount('#app') App.vue文件渲染后,输出为包含 id=app div标签的Html页面。

App.vue 解读
App.vue 是整个项目的主体框架,这个页面上的内容会存在整个项目的每个页面,提供基础的样式,vue文件分三段式
- <template> </template> 包含 HTML 页面模版<template>
<img alt="Vue logo" src="./assets/logo.png">
<HelloWorld msg="Welcome to Your Vue.js App"/> // 定义了一个 HelloWorld 标签,属性是 msg: String 在目前的Demo程序中,子组件components/HelloWorld.vue 会引用这个数据
</template> - <script> </script> 包含 js代码,以及引用其它vue组件<script>import HelloWorld from './components/HelloWorld.vue' // 引用 HelloWorld.vue 组件
export default {
name: 'App', // 将当前文件命名为 App
components: { // 在 components 属性注册引入的组件 HelloWorld
HelloWorld}
}
</script>
- <style> </style> 包含css样式<style>#app { font-family: Avenir, Helvetica, Arial, sans-serif;
-webkit-font-smoothing: antialiased;
-moz-osx-font-smoothing: grayscale;
text-align: center;
color: #2c3e50;
margin-top: 60px;
}
</style>
components/HelloWorld.vue 解读
简化<template> </template> 标签下默认的内容,把关键点提取出来解读如下, 按照调用关系描述如下:
- App.vue 是根组件,也是components/HelloWorld.vue的 父组件
- components/HelloWorld.vue 是子组件
<template>
<div class="hello">
<h1>{{ msg }}</h1> // 定义HTML模版,{{ msg }} 是定义一个变量,放在 h1 标签中
</template><script>
export default {
name: 'HelloWorld', // 将当前文件命名为 HelloWord
props: { // 通过props获取父组件传递过来的值
msg: String // 应用数据的格式,最终会传递给 HTML模版中的 {{ msg }} 变量
}
}
</script>
<style scoped>
...
</style>
到此为止,浏览器最终看到页面来自这里:

components/HelloWorld.vue 组件,通过 props 获取 App.vue (父组件)传递过来的值 <HelloWorld msg="Welcome to Your Vue.js App"/>,传递给自身 HTML模版中的 {{ msg }} 变量,
这里补充说明下:
- props是子组件访问父组件数据的唯一接口, 数据流是单向绑定的
- 父组件的属性变化时,将传导给子组件,但是反过来不会
- 每次父组件更新时,子组件的所有 prop 都会更新为最新值
03 Vue3 Vue Router 4.x入门指南
- vue 3 安装
npm install @vue/cli - vue-router 4 安装
npm install vue-router@4 --save
目录结构
├── App.vue

├── assets

│   └── logo.png

├── components

│   ├── About.vue

│   └── Home.vue

├── main.js

└── router.js
调用关系
main.js -> router.js

-> App.vue -> components/About.vue

-> components/Home.vue
main.js
import { createApp } from 'vue'

import App from './App.vue'

import router from './router'            // 引用 router.js 配置文件
createApp(App).use(router).mount('#app') // 启动实例
createApp(App).use(router).mount('#app') 分步骤对应如下代码语句:
- const app = Vue.createApp({}) // 创建并挂载根实例
- app.use(router) // 确保 use 路由实例,使整个应用支持路由。
- app.mount('#app') // 将 App.vue 渲染结果挂载到id为app的标签下
router.js
import { createWebHistory, createRouter } from "vue-router"; // 引用 vue-router 导入 createWebHistory, createRouter 方法const routes = [
{
path: "/home", // 路由的路径
name: "home", // 路由的名称
component: () => import("./components/Home.vue") // 路由的组件
},
{
path: "/about",
name: "about",
component: () => import("./components/About.vue")
}
];// 创建路由实例并传递
routes配置
const router = createRouter({
history: createWebHistory(), // 内部提供了 history 模式的实现,这里使用 hash 模式
routes, //routes: routes的缩写
});
export default router; //
App.vue
<template>
<ul>
<li> <router-link to="/home"> Go to Home </router-link> </li>
<li> <router-link to="/about"> Go to About </router-link> </li>
</ul><router-view/>
</template><script>
export default {
name: 'App'
}
</script>
<style>
#app {
font-family: Avenir, Helvetica, Arial, sans-serif;
-webkit-font-smoothing: antialiased;
-moz-osx-font-smoothing: grayscale;
text-align: center;
color: #2c3e50;
margin-top: 60px;
}
</style>
router-link这里用来替代HTML中的a标签,Vue Router 可以在不重新加载页面的情况下更改 URL,处理 URL 的生成以及编码router-view显示与 url 对应的组件
components/Home.vue
<template>
<div>
This is Vue Home Page !
</div>
</template><script>
export default {
name: "Home"
}
</script>
<style lang="stylus" scoped>
</style>
components/about.vue
<template>
<div>
This is Vue Home Page !
</div>
</template><script>
export default {
name: "Home"
}
</script>
<style lang="stylus" scoped>
</style>
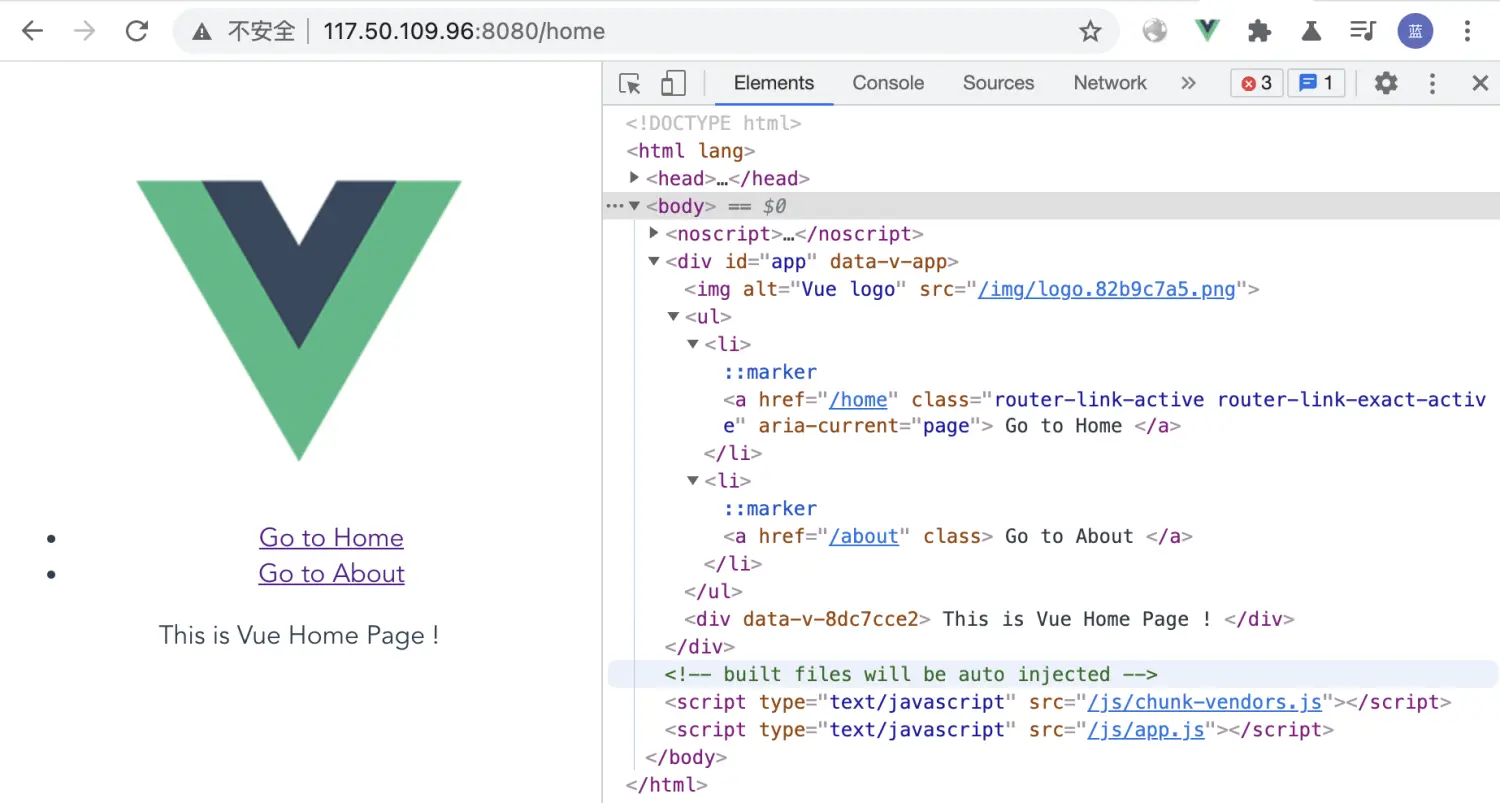
最后在vue项目目录运行命令 npm run serve,使用浏览器访问 http://127.0.0.1 点击Go to Home 和Go to About 会看到以下不同的页面(注意页面内容的变化):


打开开发者模式,会发现:
router-link 被渲染成HTML的 <a href=/xxx> 的标签
router-view 被渲染成引用子组件的内容
04 Vue3 使用Axios请求后端服务
前置工作
需要额外安装nodejs模块
npm install axios --save

npm install qs --save
目录结构
├── App.vue

├── assets

│ └── logo.png

├── components

|├── About.vue

│└── Home.vue

├── main.js

└── router.js
Vue Get请求示例
以之前的笔记 Vue Router 4.x入门指南为基础,把 components/About.vue 组件展示的数据从请求后端服务的方式来获取
<template>
<div>
{{ info }}
</div>
</template><script>
import axios from "axios";export default {
name: "Home",
data() {
return {
info: null
}
},
mounted () {
axios.get('http://dev.onwalk.net/v1/hello')
.then( response => {
this.info = response.data.message;
console.log(response);
}).catch( error => {
console.log(error);
});
}
}
</script>
<style lang="stylus" scoped>
</style>
Vue Post请求示例
以之前的笔记 Vue Router 4.x入门指南为基础,把 components/Home.vue 组件展示的数据从请求后端服务的方式来获取
<template>
<div>
{{ info }}
</div>
</template><script>
import axios from "axios";
import qs from 'qs'export default {
name: "Home",
data() {
return {
info: null
}
},
mounted () {
let data = qs.stringify("TestGinPostAPI");
axios.post('http://dev.onwalk.net/v1/post', data)
.then( response => {
this.info = response.data.message;
console.log(response);
}).catch( error => {
console.log(error);
});
}
}
</script>
<style lang="stylus" scoped>
</style>
跨域请求问题
出于安全原因,浏览器限制从脚本中发起的跨域HTTP请求(Cross-Origin Resource Sharing 跨源资源共享),。默认的安全限制为同源策略, 即JavaScript或Cookie只能访问同域下的内容。当一个请求url的协议、域名、端口三者之间任意一与当前页面地址不同即为跨域. 为解决这个问题,需要对 CROS服务器端做设置。
文中的 http://dev.onwalk.net' 服务是基于 Gin的Go框架实现,这里是通过设置Http请求的Header 字段 Access-Control-Allow-Origin: * 来实现跨域访问,代码片段参考如下:
v1.POST("/post", func(c gin.Context) {
c.Writer.Header().Set("Access-Control-Allow-Origin", "")
message := c.PostForm("message")
c.JSON(200, gin.H{"status": message })
})v1.GET("/get", func(c *gin.Context) { c.Writer.Header().Set("Access-Control-Allow-Origin", "*") c.JSON(http.StatusOK, gin.H{"message": "Welcome Test Go Gin Get API!"}) })</code></pre></div></div><h3 id="fcbt9" name="%E6%9C%80%E7%BB%88%E6%95%88%E6%9E%9C">最终效果</h3><p>改写的About.vue和Home.vue 重新构建运行后效果如下</p><figure class=""><div class="rno-markdown-img-url" style="text-align:center"><div class="rno-markdown-img-url-inner" style="width:83.81%"><div style="width:100%"><img src="https://cdn.static.attains.cn/app/developer-bbs/upload/1722945604667844238.webp" /></div><div class="figure-desc">image</div></div></div></figure><figure class=""><div class="rno-markdown-img-url" style="text-align:center"><div class="rno-markdown-img-url-inner" style="width:83.81%"><div style="width:100%"><img src="https://cdn.static.attains.cn/app/developer-bbs/upload/1722945604999323746.webp" /></div><div class="figure-desc">image</div></div></div></figure><h2 id="c41jt" name="05-Vue3-%E4%BD%BF%E7%94%A8antd-%E9%A1%B5%E9%9D%A2%E5%B8%83%E5%B1%80">05 Vue3 使用antd 页面布局</h2><h3 id="diajg" name="%E6%A6%82%E8%BF%B0">概述</h3><p>最近抽出时间把Vue3前端的学习又往前推进一步了,按照 vue3 composition api 代码组织方式,照葫芦画瓢的实现一个简单的左右两栏布局,点击左边栏菜单,右侧可以显示对应菜单的功能。虽然有点丑,但不再是个单页面,搭建了一个项目的雏形,后续可以在此基础可以更多的事情,顺理下思路,作此笔记。</p><h3 id="fa5mm" name="%E7%8E%AF%E5%A2%83%E4%BF%A1%E6%81%AF%E5%92%8C%E5%BC%80%E5%8F%91%E5%BA%93%E7%89%88%E6%9C%AC">环境信息和开发库版本</h3><p>Nodejs v14.18.1,Npm 6.14.15</p><ul class="ul-level-0"><li>"vue": "^3.0.0",</li><li>"axios": "^0.21.1",</li><li>"ant-design-vue": "^2.2.8",</li><li>"echarts": "^5.2.0",</li><li>"vuex": "^4.0.2",</li><li>"vue-router": "^4.0.10",</li><li>"qs": "^6.10.1"</li></ul><h3 id="dopfn" name="%E6%BA%90%E7%A0%81%E7%9B%AE%E5%BD%95%E8%AF%B4%E6%98%8E">源码目录说明</h3><div class="rno-markdown-code"><div class="rno-markdown-code-toolbar"><div class="rno-markdown-code-toolbar-info"><div class="rno-markdown-code-toolbar-item is-type"><span class="is-m-hidden">代码语言:</span>txt</div></div><div class="rno-markdown-code-toolbar-opt"><div class="rno-markdown-code-toolbar-copy"><i class="icon-copy"></i><span class="is-m-hidden">复制</span></div></div></div><div class="developer-code-block"><pre class="prism-token token line-numbers language-txt"><code class="language-txt" style="margin-left:0">├── src
│ ├── main.js
│ ├── App.vue
│ ├── components
│ │ ├── layout.vue # 布局页面组件
│ │ └── sider.vue # 侧边栏菜单组件
│ ├── pages
│ │ ├── about.vue # 普通页面组件
│ │ ├── button.vue # antd 按钮组件
│ │ ├── echart.vue # echart组件
│ │ └── home.vue # 普通页面组件
│ └── router
│ └── index.js # 路由
- src/main.js 对antd做了全局引用import Antd from 'ant-design-vue';
import 'ant-design-vue/dist/antd.css';
...
app.use(Router); - src/components 用于存放Web页面的布局组件
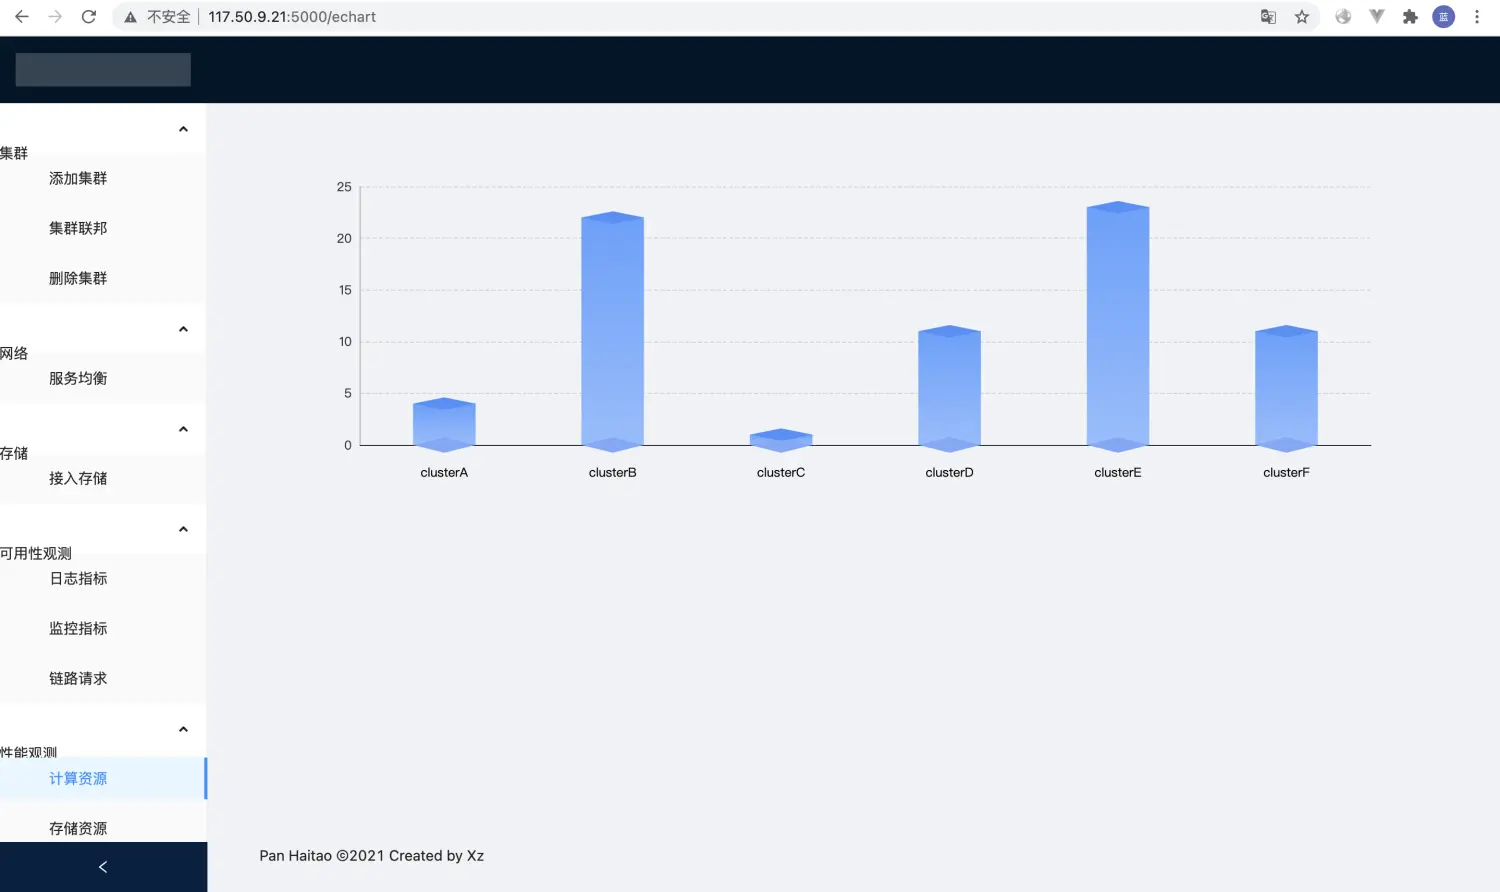
依赖关系如下:App.vue -> layout.vue -> sider.vue这三个组件纯粹用于页面布局,菜单位于左边栏,header,context, footer 位于右边栏 - src/pages 用于存放业务功能的组件,被菜单和布局组件调用,静态的页面路由定义在 src/router/index.js, 由main.js全局引用
- 点击 sider.vue 组件实现的菜单,菜单中 < router-link > 定义的api请求,在 layout.vue 组件中被 < router-view > 渲染, 从而实现一个多功能可扩展的动态的Web页面
具体代码可以参考:https://github.com/panhaitao/Vue3-demo
实现效果如下

参考
- Vue3 组合式 API: https://vue3js.cn/vue-composition-api/
- https://router.vuejs.org/zh/installation.html
- https://www.jianshu.com/u/a9633a4e84c7
- https://blog.csdn.net/xj932956499/article/details/100916147
- 简书博客 AJAX-跨域请求 https://www.jianshu.com/p/b83094c81ca9
- axios的基本用例 https://www.axios-http.cn/docs/example
- 使用 axios 访问 API https://cn.vuejs.org/v2/cookbook/using-axios-to-consume-apis.html
- Vue Router 4.X 中文参考文档 https://next.router.vuejs.org/zh/guide/
- Vue 3 CRUD example with Axios & Vue Route https://bezkoder.com/vue-3-crud/
- P78【Vue和服务端交互】vue-router的使用 https://www.bilibili.com/video/BV14r4y1w7F5?p=78
- https://vue3js.cn/global/createApp.html
- new Vue() vs createApp() https://www.bilibili.com/read/cv10133036/
- https://gitee.com/wear-crown/seckill-system-front
- ES6 特性简介 https://www.cnblogs.com/burningmyself/p/7451393.html
- Nodejs官网下载地址:https://nodejs.org/en/download/
- Vue3官方Dockerfile参考: https://vuejs.org/v2/cookbook/dockerize-vuejs-app.html